- Operation Crimp
-
Operation Crimp (8–14 January 1966), also known as the Battle of the Ho Bo Woods, was a joint US-Australian military operation during the Vietnam War, which took place 20 kilometres (12 mi) north of Cu Chi in Binh Duong Province, South Vietnam. The operation targeted a key Viet Cong headquarters that was believed to be concealed underground, and involved two brigades under the command of the US 1st Infantry Division, including the 1st Battalion, Royal Australian Regiment (1 RAR) which was attached to the US 173rd Airborne Brigade. Heavy fighting resulted in significant casualties on both sides, but the combined American and Australian force was able to uncover an extensive tunnel network covering more than 200 kilometres (120 mi).
The operation was the largest allied military action mounted during the war in South Vietnam to that point, and the first fought at division level. Despite some success, the allied force was only able to partially clear the area and it remained a key communist transit and supply base throughout the war. The tunnels were later used as a staging area for the attack on Saigon during the 1968 Tet offensive before they were largely destroyed by heavy bombing from American B-52 bombers in 1970, ending their utility.
Contents
Background
Main articles: Vietnam War and Military history of Australia during the Vietnam WarThe initial American commitment to the war was limited to materiel and advisors only, and by 1964 there were 21,000 US advisors in South Vietnam.[1] Yet the worsening situation led to a significant escalation of the war in 1965, with a large-scale commitment of ground troops under the command of General William Westmoreland.[2] Initially the Americans had adopted a cautious strategy, applied to the strictly limited role of base defence by US Marine units. This was abandoned in April 1965, and replaced by a new 'enclave strategy' of defending key coastal population centres and installations.[3] This strategy required the introduction of nine additional US battalions, or 14,000 troops, to bring the total in Vietnam to 13. Allied nations of the Free World Military Forces were expected to contribute another four battalions.[4] Westmoreland planned to develop a series of defensive positions around Saigon before expanding operations to pacify the South Vietnamese country-side and as a result a number of sites close to Viet Cong dominated areas were subsequently chosen to be developed into semi-permanent divisional-level bases. Such areas included Di An which was intended to become the headquarters of the US 1st Infantry Division, while the US 25th Infantry Division would be based in the vicinity of Cu Chi. However, large-scale military operations to clear the intended base areas had to wait until the dry season.[5]
Australia's growing involvement in Vietnam reflected the American build up. In 1963, the Australian government had committed a small advisory team, known as the Australian Army Training Team Vietnam (AATTV), to help train the South Vietnamese forces.[6] However in June 1965 the decision to commit ground troops was made, and the 1st Battalion, Royal Australian Regiment—originally commanded by Lieutenant Colonel Ivan 'Lou' Brumfield—was dispatched. Supporting 1 RAR was 1 Troop, A Squadron, 4th/19th Prince of Wales's Light Horse with M-113 Armoured Personnel Carriers, artillery from 105 Field Battery, Royal Regiment of Australian Artillery and 161 Field Battery, Royal New Zealand Artillery, and 161 Reconnaissance Flight operating Cessna 180s and Bell H-13 Sioux light observation helicopters; in total 1,700 personnel.[7] The Australian units were attached to the US 173rd Airborne Brigade under the command of Brigadier General Ellis W. Williamson in Bien Hoa[8] and operated throughout the III Corps Tactical Zone to help establish the Bien Hoa-Vung Tau enclave.[9] Although logistics and resupply were primarily provided by the Americans, a small logistic unit—1st Australian Logistics Company—was situated at Bien Hoa airbase.[7] Unlike later Australian units that served in Vietnam, which included conscripts, 1 RAR was manned by regular personnel only.[10] The battalion commenced operations in late June 1965 and initially focussed on defeating the Viet Cong's wet season offensive. During this time US 173rd Brigade, including 1 RAR, conducted a number of operations into War Zone D—a major communist base area at the junction of Phuoc Long, Long Khanh, Bien Hoa and Binh Duong provinces. Operations were also conducted in the notorious Iron Triangle, formed by the confluence of the Saigon and Thi Tinh rivers and Route 7, where they fought a number of significant actions including the Battle of Gang Toi in November, before launching Operation Marauder on the Plain of Reeds in the Mekong Delta on New Years Day 1966.[11][12][13]
Prelude
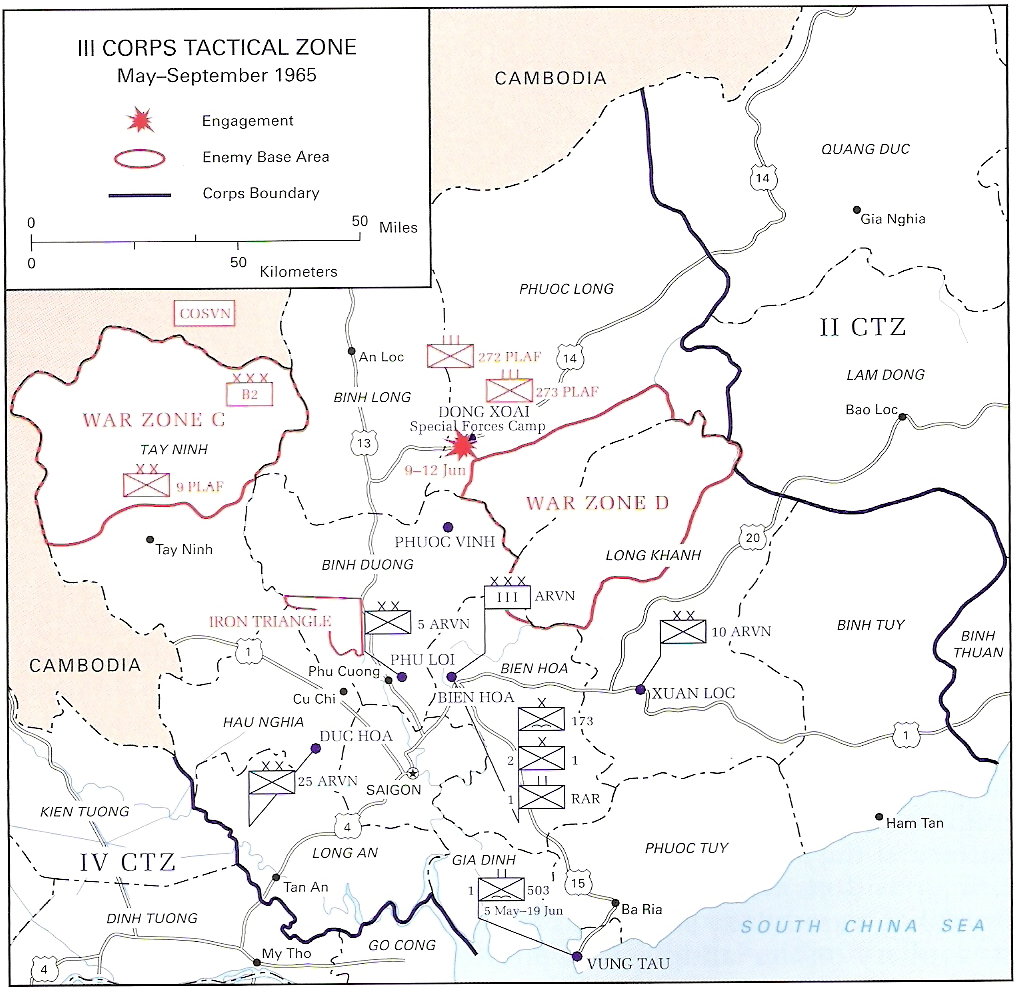
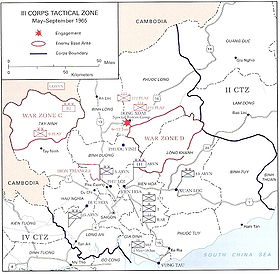 III CTZ May to September 1965.
Located 4 kilometres (2.5 mi) west of the Iron Triangle, the Ho Bo Woods were believed to contain the political-military headquarters of the communist 4th Military Region, which controlled all Viet Cong activity around the South Vietnamese capital, Saigon. Although its precise position was unknown, it was believed to be concealed in an extensive underground bunker system.[14] Agents' reports, the interrogation of prisoners, and aerial surveillance all pointed to the presence of this vital communist facility. The headquarters itself was believed to be located in a 31-square-kilometre (12 sq mi) area of jungle and marshland, and to have four entrances guarded by a Viet Cong Regional Force company, while two Main Force battalions were also thought to be in the vicinity to afford additional security.[15] Communist units detected in the Ho Bo Woods by allied intelligence included the C306 Local Force Company, 3rd Quyet Thang Battalion and 7th Cu Chi Battalion.[16][Note 1][Note 2] The commander of the Cu Chi Battalion was later identified after the war as Captain Nguyen Thanh Linh.[17] In total, local communist defensive strength was believed to include 1,000 men.[18]
In response, a large American 'search-and-destroy' operation was launched in January 1966, involving more the 8,000 troops commanded by the US 1st Infantry Division under Major General Jonathan O. Seaman, including the US 3rd Infantry Brigade, 1st Infantry Division and the US 173rd Airborne Brigade, which was attached to the division for the operation; in total six battalions plus supporting arms.[19][20] Still attached to the US 173rd Brigade was the Australian battalion, 1 RAR—by now commanded by Lieutenant Colonel Alex Preece—with 105 Field Battery in direct support, as well as engineers from 3rd Field Troop, Royal Australian Engineers and the M113s from the Prince of Wales Light Horse.[21] At the time it was the largest military operation mounted in South Vietnam, being the first divisional offensive to date.[19] Preceded by a heavy aerial bombardment, the scheme of manoeuvre envisioned an airmobile assault by the US 173rd Brigade in the north and west, while the US 3rd Infantry Brigade would seal off the area to the south, in preparation for a sweep designed to push trapped communist forces eastwards against the Saigon River. 1 RAR's role was to establish a blocking position in a village beside the river on the northern flank of the brigade's area of operations.[14] In order to achieve tactical surprise, the operation was launched immediately following Operation Marauder, with the Australians and Americans redeployed by air.[22][23]
Prior to the assault, the 1 RAR Operations Officer, Major John Essex-Clarke, conducted an aerial reconnaissance of the proposed Landing Zone—known as LZ June—on 7 January. Observing a lack of ground foliage, he was concerned about the possibility of extensive Viet Cong defensive works close to the LZ, and with the support of Williamson the landing zone was subsequently switched to a less-exposed location. The original plan would have seen 1 RAR inserted directly on top of a heavily defended bunker system, and would have likely resulted in heavy casualties.[14] Captain Alec MacGregor, the commander of the 3rd Field Troop, was of the opinion that the "decision almost certainly saved hundreds of Australian lives."[24]
Battle
Insertion, 8 January 1966
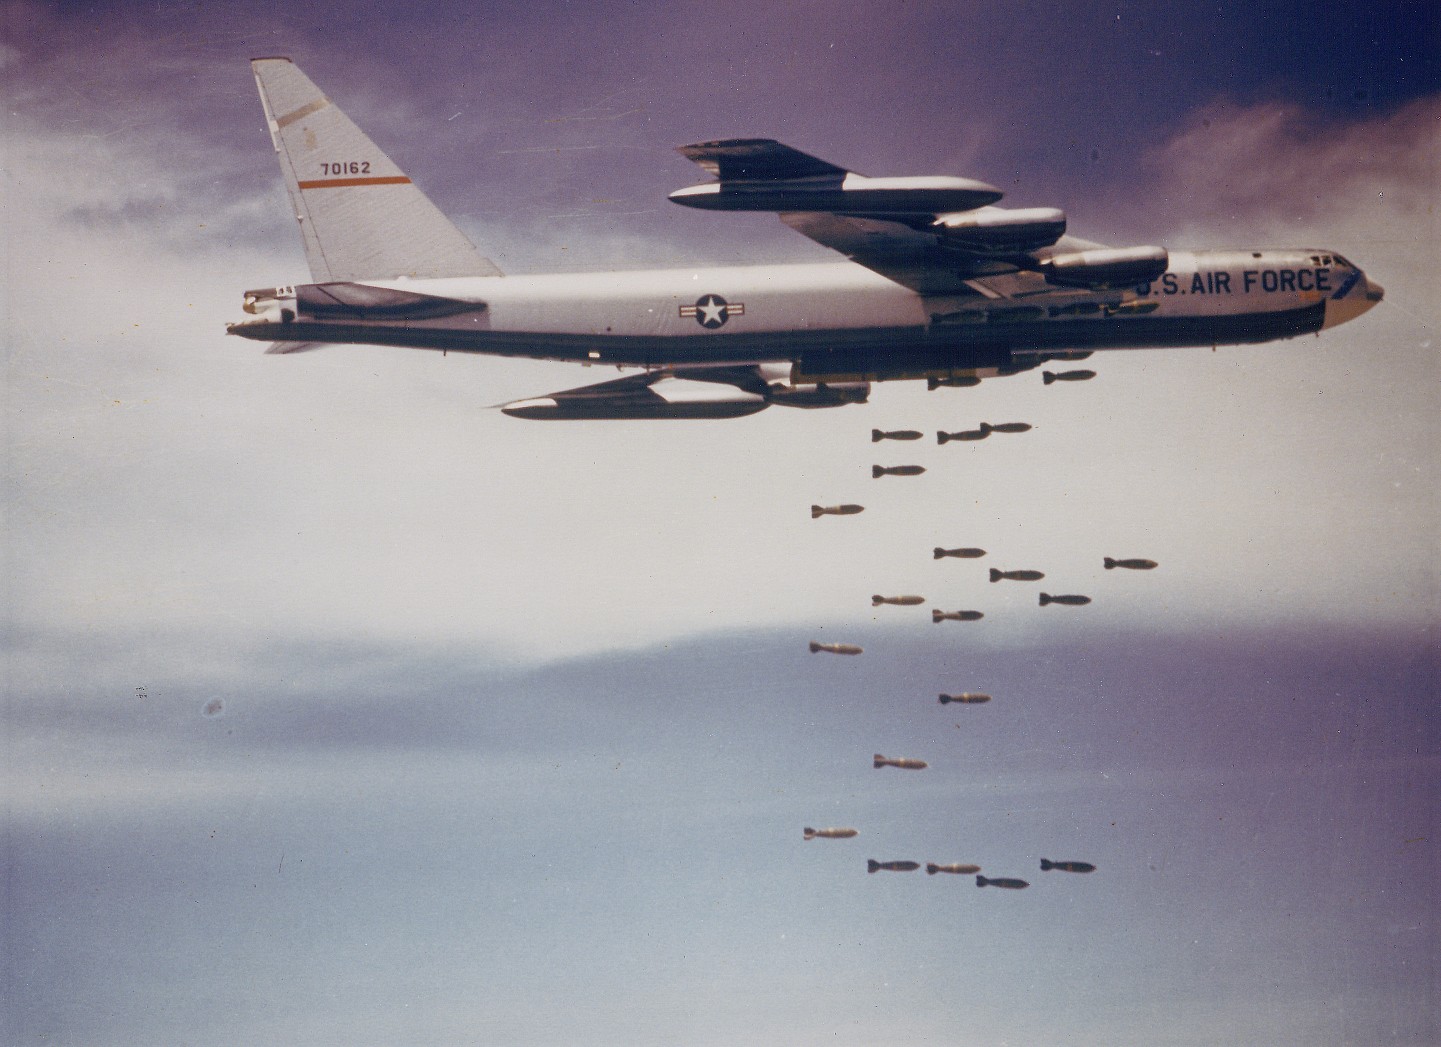
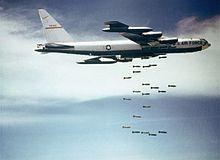 An American B-52 on a bomb run over South Vietnam, similar to those used during Operation Crimp.
The battle began at 09:30 on 8 January with heavy American preparatory fire from artillery, as well as napalm and airstrikes from B-52 bombers which resulted in significant defoliation.[25] Soon after the airmobile operation commenced with the first American units being inserted by helicopter to the north, west and south.[25] The US 3rd Infantry Brigade—under the command of Colonel William Brodbeck—was subsequently inserted by helicopter and by road. The brigade headquarters and command element departed Di An in convoy and reached Trung Lap on the western boundary of the brigade's area of operations by midday. Concurrently, two battalions were inserted by helicopter to the south-west, one blocking the south side of the Ho Bo Woods while the other conducted a sweep. The Americans were in contact almost immediately, although the engagements were generally small scale, or involving snipers.[26] Meanwhile the brigade's third battalion moved by road to Trung Lap and then moved on foot to its assigned search area.[27]
In the north, 1 RAR was inserted into its new landing zone—LZ March—3 kilometres (1.9 mi) to the south-west.[28] With B Company securing the site, the battalion moved on foot to the line of departure but not before they were mistakenly engaged by US helicopter gunships and artillery fire. However, after the Australians established communications, the shelling was halted and they began their advance.[29] No sooner had the lead elements—D Company under the command of Major Ian Fisher—emerged into the cleared area that was originally to have been used as the battalion's LZ, when the forward platoon came under fire from Viet Cong positions in the tree-line on the north-east corner.[28] In the action which followed, six Australians from 12 Platoon were wounded, including platoon commander Lieutenant Jim Bourke, who was shot through the jaw but remained in command until he passed out from loss of blood.[29] Meanwhile two medics who attempted to move forward to treat the casualties were themselves shot and killed.[28]
Preece moved to push his other companies around each flank of D Company, and towards the battalion's original blocking position. Soon they were also in contact with small groups of Viet Cong from positions behind trees and in bunkers, while others popped up from spider holes and tunnel entrances; it became apparent to the Australians that they had stumbled across a significant Viet Cong force in extensive fortifications, sufficient to hold a battalion.[28] B Company, under the command of Major Ian McFarlane, also uncovered a small dug-in hospital with simple transfusion equipment, documents and bandages.[30] Meanwhile, the remaining battalions of the US 173rd Airborne Brigade had also been inserted. The 1st Battalion, 503rd Infantry Regiment flew into LZ April at 12:00, while 2/503rd Battalion arrived at LZ May at 14:30.[31] With the insertion going largely according to plan, the brigades began their advance eastwards.[20] Converging on the suspected location of the communist headquarters, a thorough search of the area yielded little, and it was believed that the Viet Cong had withdrawn earlier in response to the initial Australian advance.[31]
Amid strong resistance, the Australians were made to fight their way through the maze of bunkers, punji stakes and booby traps but they were eventually able to force a Viet Cong regional force company to withdraw as they continued their advance.[28] The area was heavily seeded with trip wires connected to shells and grenades dangling from branches, one of which blew McFarlane and several of his men off their feet.[32] The defenders subsequently withdrew, with 7th Cu Chi Battalion forced north and 3rd Quyet Thang Battalion to the east.[33] Suspecting they were being drawn into a trap—as one of the American battalions of the brigade had been previously during Operation Hump[20]—the Australians moved into a tightly defended perimeter before dark and waited for the communists to counter-attack.[28] As night fell, movement was detected along a trench on the C Company perimeter when a squad of Viet Cong attempted to infiltrate the Australian position. Initially believing the movement to be another Australian patrol that had just departed on a clearing patrol, the machine-gunner on sentry duty finally opened fire at the last safe moment, killing one of the infiltrators at point-blank range and wounding a number of others before they withdrew.[34]
Minor actions continued into the night, with small groups of Viet Cong able to pop up undetected and then disappear at will from within the Australian defensive position. The searching units were unable to locate Viet Cong in large numbers but experienced a significant number of sudden engagements and ambushes throughout the day, and it became clear that the communists were using tunnels for movement and concealment. Preece suspected that the area was honeycombed with tunnels and that the communist headquarters that he had been tasked to destroy was in fact located beneath the feet of the battalion.[28] The Australians were the only battalion in the US 173rd Brigade to strike significant resistance, and by the end of the first day 1 RAR had suffered a total of three killed and 15 wounded, while the artillery Forward Observer from 105 Field Battery had also been killed.[35] The battalion spent a sleepless night and in the early hours of the morning there were a number of short exchanges of fire as small groups of Viet Cong returned to the area. Not wanting to fire the machine-guns for fear of giving their positions away or hitting friendly troops, the Australians resorted to using grenades forward of the perimeter.[36] Meanwhile, in the US 3rd Infantry Brigade area of operations contact had been light, with only six Viet Cong killed.[37]
Tunnels of Cu Chi, 9 January 1966
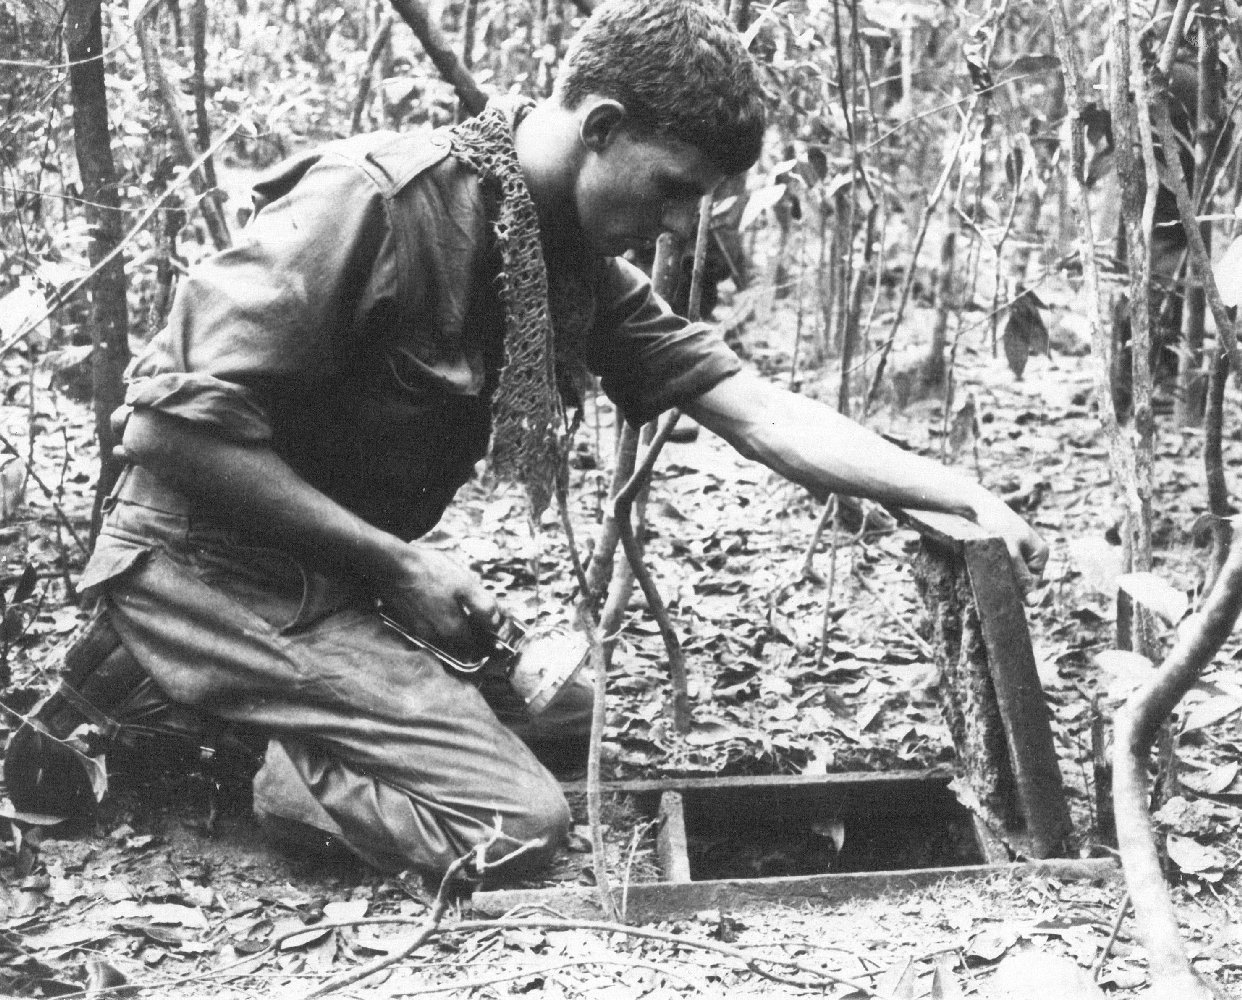
Main article: Cu Chi tunnels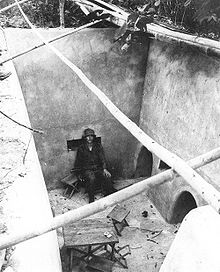 Australian soldier in Viet Cong tunnel uncovered during Operation Crimp.
The process of breaking into and exploring the communist tunnels began on 9 January, with the objective now switching to the location, clearance and destruction of the tunnel complexes.[28] Whereas standard US Army practice was to seal, blow up or otherwise attempt to render tunnel systems unusable with smoke, tear gas and explosives before quickly moving on, the Australians spent the next few days laboriously searching and mapping the complexes they found using military engineers.[28] Led by Captain Sandy MacGregor, the Australian sappers from 3 Field Troop systematically tackled the tunnels, using telephone line and compasses to plot the subterranean passages. Small-scale contacts between the communists and the Australians continued and MacGregor was later awarded the Military Cross for his leadership.[38]
Originally constructed in 1945 by the Viet Minh during the fighting with the French in the First Indochina War, the tunnels at Cu Chi had taken decades to build but later had lain dormant after the war until 1960, when they were reactivated. Since then they had endured constant bombing, all the while being expanded. By 1965 they formed an underground maze of passages, fighting tunnels, meeting rooms and food caches, stretching from Saigon to the Cambodian border. Given their headquarters function, the tunnels were equipped with an array of communications and medical facilities and were defended by interlocking arcs of fire and connecting fire tunnels.[39] Dug into hard clay which had largely protected them from American bombing, some trenches were reported as being more 1.8 metres (5.9 ft) deep, and some tunnels as long as 460 metres (500 yd), while numerous side tunnels led from the main tunnels.[40] In places the system was between one, two and even three levels deep.[17] The network was so extensive that they were rumoured to be able to hold 5,000 men, many of whom lived underground for up to six months at a time.[41] On seeing the tunnels one American soldier described them at the time as "the New York subway".[40]
In the southern area of operations, the US 3rd Infantry Brigade was making slow progress, with the Viet Cong using hit-and-run and ambush tactics to inflict casualties on the Americans, before withdrawing into the sanctuary of their underground tunnels.[42] On 9 January, the Americans located and destroyed a cache of medical supplies, as well as a large amount of rice and a small hospital, as well as capturing 30 Viet Cong during a series of skirmishes.[27] To the north, while 1 RAR searched the tunnel complex the American battalions of the US 173rd Airborne Brigade continued to sweep their area of operations, with a number of friendly fire incidents complicating their task.[43][44] Both the 1/503rd and 2/503rd Battalions searched eastward toward the Saigon River and, although they continued to find supply caches and abandoned positions, they were involved in only minor skirmishes with the Viet Cong.[43] Concealed in well-camouflaged ambush positions however, the communists inflicted a number of casualties on the Americans.[44] Only one Viet Cong was killed during the fighting, bringing the total for the operation to just 22. Despite the large number of US troops involved they had experienced only limited contact to that point, and criticism of the operation consequently began to mount in the American media.[40][45]
Fighting intensifies, 10–11 January 1966
The Australians continued to explore the tunnels, finding a large quantity of documents and equipment, and by 10 January they had recovered 59 weapons, 20,000 rounds of ammunition, 100 fragmentation grenades, one 57 mm recoilless rifle, explosives, clothing and medical supplies. At least 11 Viet Cong had also been killed in the fighting.[46] Contact also continued, and overnight the Australians killed another five Viet Cong outside their perimeter, while numerous actions occurred during the day as the US 173rd Brigade maintained its sweep.[47] On 10 January at 09:00 the American cavalry from Troop E, 17th Cavalry Regiment and the Australians from the Prince of Wales Light Horse commenced a combined search operation and fought communist snipers and small groups throughout most of the day. At 14:00 a number of Viet Cong dug-in in trenches were encountered, and following a series of air-strikes and artillery barrages, the cavalry and the Australian M113s swept the area during which several Australians were slightly injured by a misdirected US Navy air-strike. Sixteen Viet Cong bodies were subsequently recovered, and another 60 were believed to have been killed but had been removed from the battlefield.[48]
Williamson subsequently ordered the 1/503rd Battalion—under the command of Lieutenant Colonel John Tyler—to change the direction of its advance.[43] During the morning the battalion had conducted platoon-sized patrols south, south-west and west, locating a well-constructed defensive position, including bunkers and trenches connected by tunnels. With no contact as yet made with the Viet Cong, the battalion prepared to move to a new AO in the north by 13:30. During this move the battalion, and armour from Troop D, 16th Cavalry Regiment, engaged a dug-in Viet Cong Main Force company less than 2,000 metres (2,200 yd) west of the Australians. Following air-strikes and heavy artillery bombardment the communists withdrew, leaving 29 dead during a sharp engagement.[43][44][49] The 2/503rd Battalion had also sent out a number of squad-sized patrols during the day, but no recent signs of Viet Cong activity were found, and only minor sniper fire encountered.[49] However, like the Australians, the American paratroopers also uncovered a large number of tunnels and other fortifications.[44]
Meanwhile, the US 3rd Brigade continued to make slow progress and, despite reaching the banks of the Saigon River by 10 January, only a few brief glimpses of the Viet Cong had been made.[26][50] A small base camp was discovered and destroyed however, while another battalion captured more than 10 tons of rice and 15 bales of cotton.[42] The following day the Americans found and destroyed more bunkers and a number of houses and sampans, as well as quantities of supplies and food. They also uncovered a tunnel complex and a quantity of maps, charts and documents, although still little resistance was met. During these actions the Americans lost more men to booby traps than enemy fire.[42] Advancing on a 1,500 metres (1,600 yd) front, troops from the 1/28th Battalion—commanded by Lieutenant Colonel Robert Haldane—took a number of casualties from snipers, although the source of the fire was not immediately obvious.[50] The Viet Cong attempted to avoid a set piece battle, opting instead to disperse into small groups to fight from their spider-holes and tunnels and only choosing to engage the Americans at close range with small arms, which included old Russian K-44 rifles. Despite suffering a number of casualties the Americans continued to advance, calling in artillery fire.[51] Such tactics proved largely ineffectively though and the Commanding Officer of 2/28th Battalion, Lieutenant Colonel George Eyster, was himself shot and killed by a sniper during the fighting.[17][50] Regardless, after receiving word of the discovery of the tunnels by US 173rd Airborne Brigade to their north, the brigade began another sweep.[52]
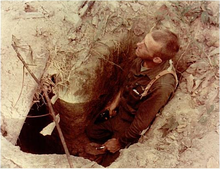 A US 1st Infantry Division soldier enters a tunnel during Operation Crimp.
The US 3rd Brigade subsequently also uncovered a significant tunnel complex, after Sergeant Stewart Green from 1/28th Battalion accidentally sat down on a nail and uncovered a trap door on 11 January. Volunteering to enter the tunnel, Green then located an underground dispensary occupied by more than 30 Viet Cong who subsequently escaped. Later a smoke machine was used to pump smoke into the tunnel system, and this was successful in locating numerous tunnel entrances and bunkers as the smoke rose above the jungle canopy.[50] They were the first American troops to enter the tunnels, and they proceeded to attack them with CS gas, and later explosives.[53] However, such tactics met with limited success with the tear gas flushing out large numbers of women and children, but few Viet Cong.[40] Led by Green, a squad of Americans equipped with flashlights, pistols and a field telephone penetrated over 1.6 kilometres (0.99 mi) of the tunnel system before becoming involved in a fire-fight with the Viet Cong. Wearing gas-masks the Americans threw gas grenades and fought their way back to the tunnel entrance, but one soldier became lost in the darkness and Green re-entered the tunnel to find him. The Viet Cong subsequently withdrew.[54]
Yet even as the Americans were attempting to clear the tunnels, heavy hand-to-hand fighting broke out above ground and Haldane was later awarded the Silver Star for his actions when he rushed a bunker while under fire armed only with a pistol, in order to give first aid to a number of wounded soldiers. His courage inspired his men to complete the assault, and ultimately helped ensure the successful evacuation of the casualties and the capture of their objective.[53] That evening the battalions of US 3rd Infantry Brigade had completed searching their assigned area of operation, and the following morning they were withdrawn from the operation. The brigade's involvement in Crimp had been limited, losing six killed and 45 wounded, while 22 Viet Cong had been killed.[42] It was subsequently redeployed on Operation Buckskin.[55]
Crimp continues, 12–13 January 1966
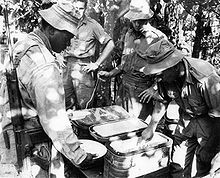 Australian soldiers being served a hot meal near the scene of the fighting.
As they had done previously, the communists continued to attempt to infiltrate the 1 RAR perimeter during the night, and a minor clash with an Australian standing patrol occurred at dawn.[56] Over the next two days, operations to exploit the tunnels continued, with the US 173rd Brigade and the Australians involved in a number of contacts, as well as suffering from sporadic sniper and mortar fire. Significant quantities of documents, equipment and rice were captured however, and large numbers of civilians detained for questioning.[57] On 12 January, 1 RAR continued its patrolling program and one patrol subsequently located 15 tons of rice and destroyed it after killing six Viet Cong during a 20-minute battle.[58][59] The task was complicated by the presence of a large number of civilians however, and many were found hiding in shelters and tunnels and they had to be coaxed out of hiding by the Australians and transported to a refugee camp which had been established nearby.[60] Another patrol from 11 Platoon later uncovered a tunnel system just 50 metres (55 yd) from their position, and found it to be occupied by a large Viet Cong force after a dog and its handler were sent into the tunnel to investigate. Eight Viet Cong were subsequently killed after the tunnel was destroyed by Australian engineers.[61]
The same day, however, the Australian efforts to clear the tunnels had suffered a setback after an engineer became stuck in a trap door between one underground gallery and another, more than 2 metres (6.6 ft) below the surface. Despite the efforts of his comrades, he could not be recovered and died from asphyxiation after being overcome by a combination of tear gas, carbon monoxide, and lack of oxygen when he dislodged his respirator during the struggle to free himself.[46] After days of living in close proximity to the enemy, the constant strain of sniper fire and the pressure of searching the tunnels was also beginning to take its toll, and a number of Australians were killed and wounded in otherwise avoidable friendly fire incidents on the evenings of 10 and 12 January.[62] During the early afternoon of 12 January the Australians encountered a large group of armed Viet Cong during a tunnel clearance and called on them to surrender. However they failed to emerge and the tunnel was subsequently demolished, probably killing eight Viet Cong who were believed to have been entombed as it collapsed.[63]
Meanwhile the same day Haldane ordered 1/28th Battalion to closely explore the tunnels in their area of operations, uncovering a number chambers and trapdoors defended by grenades and booby traps. A Company subsequently located another tunnel system after an American was killed by a Viet Cong soldier who suddenly appeared out of a large anthill.[54] Later, as the 1/503rd continued to search its area with platoon-size patrols during the afternoon of 13 January, a clash between Company C and a Viet Cong platoon developed into a heavy contact. An air-strike was successfully called in by the Americans however, and a search of the area recovered 10 dead Viet Cong, while blood trails and human remains indicated that perhaps another 20 were also killed.[64]
Action concludes, 14 January 1966
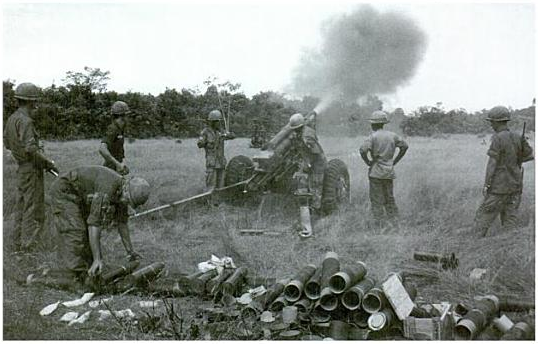
 A US 105 mm howitizer providing fire support to the US 173rd Airborne Brigade on the final day of Operation Crimp.
Ultimately, more than 17 kilometres (11 mi) of tunnels had been uncovered and searched by the Australians. A large quantity of documents had been recovered, including more than 100,000 pages detailing operational structure as well as the names of agents operating in Saigon. Ninety weapons were also captured, as well as thousands of rounds of ammunition and enough equipment, food and other supplies to fill eight 2½-tonne trucks.[28] Although the US battalions had played a large part in the operation and had also uncovered numerous tunnel systems and been involved in heavy contact, by the fortunes of war 1 RAR had been allocated the area of operations that was ultimately found to contain the Viet Cong headquarters. The Australians had even partially searched the tunnel leading to the headquarters that was their objective, but did not learn how close they had come to succeeding until decades after the war had ended.[65] During the course of these activities the searchers had suffered a number of additional fatalities from Viet Cong snipers.[28]
Fully exploring and destroying the tunnels was well beyond the allied resources available, and the decision was eventually made to call a halt to operations.[44] Six days after it began, Operation Crimp ended, with 1 RAR returning to Bien Hoa on 14 January.[28] By the time the operation was concluded only a fraction of the known tunnel network had been destroyed and it was not until after the war that it was learnt that the system at Cu Chi actually included more than 200 kilometres (120 mi) of tunnels.[28] Although further American ground operations as well a number of heavy B52 bombing raids resulted in further damage to the tunnel complexes, the Ho Bo Woods were never occupied on a permanent basis and the Viet Cong were successful in restoring their transit and supply functions.[66] As such, despite significant disruption, the military and political apparatus in Cu Chi remained largely intact, allowing the communists freedom of action for later operations against Saigon.[41]
Aftermath
During the fighting the Australians had faced stiff resistance and had suffered eight killed and 29 wounded, while claiming 27 Viet Cong killed and a further 30 probably killed.[21] The Americans had also been involved in heavy fighting and their casualties included 14 killed and 76 wounded.[21] Total communist casualties included 128 confirmed killed, and another 190 probably killed, as well as 92 captured and another 509 suspects detained.[67] In addition many more Viet Cong were thought likely to have perished in the tunnels as they were collapsed by charges laid by the Australian engineers.[66] The Americans later claimed that the headquarters of the communist 4th Military Region had also been destroyed.[68] Due to the quantity of information recovered from the thousands of captured documents alone, the battle was later described as the first allied strategic intelligence victory of the war.[69] So significant was the find that both Westmoreland and General Joseph McChristian, the head of Intelligence at MACV, visited 1 RAR during Operation Crimp.[70][Note 3] Allied operations against the communist tunnels had been largely ad hoc, and the Australians began to develop the earliest techniques for exploring and destroying them.[71] Later, at least partially as a result of the success of the Australians in clearing some of the shorter tunnels, American units adopted similar tactics and created a number of tunnel-clearance teams, known popularly as Tunnel Rats.[72][Note 4]
Despite the losses suffered by the communists, the combined American and Australian force had only succeeded in partially clearing the area and the tunnel network it concealed, and consequently the Ho Bo Woods would remain a key communist transit and supply base throughout the war.[28] Indeed the bulk of the communist force had successfully withdrawn intact, leaving only rear guard elements in defence, prompting the communists to also declared the operation a victory, claiming almost 2,000 American troops killed or wounded, 100 vehicles destroyed, and 50 aircraft shot down.[73] Yet, such claims were based on estimates of casualties caused by command-detonated mines, punji sticks and other booby traps, and proved to be wildly inaccurate.[74] In fact Operation Crimp had rattled the communists, and they subsequently ordered their units in the south to prevent the Americans from concentrating their forces in the future.[75] Regardless it also highlighted the inherent weakness of the search-and-clear operations that would later become standard operating procedure for the US Army in Vietnam.[76]
At the strategic level, the allied enclave strategy proved only transitory.[77] Further setbacks led to additional troop increases to halt the losing trend, with US troop levels planned to rise from 210,000 in January to 326,000 by December 1966.[78] In March 1966, as part of this strategy, the Australian government also increased its commitment to the ground war in Vietnam, committing a two battalion brigade—known as the 1st Australian Task Force (1 ATF)—with armour, aviation and artillery support; in total 6,300 personnel.[79] 1 RAR was subsequently replaced and 1 ATF was allocated its own area of operations in Phuoc Tuy Province, thereby allowing the Australians to pursue operations more independently using their own tactics. The task force arrived between April and June 1966, constructing a base at Nui Dat, while logistic arrangements were provided by 1st Australian Logistics Support Group which was subsequently established at the port of Vung Tau.[80] Operation Crimp was 1 RAR's third and last foray into the communist heartland and following the fighting they had more than two weeks rest in Bien Hoa—their longest break from operations during the battalion's tour.[81][82] Further operations followed in the months afterwards however, including the Battle of Suoi Bong Trang on the night of 23–24 February 1966.[28]
The Ho Bo Woods were again targeted by the Americans in January 1967, during a much larger operation known as Operation Cedar Falls.[83] However despite heavy casualties again being inflicted on the Viet Cong, the tunnels continued to remain a problem for the Americans and they were later used as a communist staging area for the attack on Saigon during the 1968 Tet offensive.[84] Finally in 1970, American B-52 bombers carried out a number of heavy air-strikes on the area, dropping thousands of delayed-fuse bombs that buried deep into the ground before exploding, ending the tunnels' utility.[53]
Notes
- Footnotes
- ^ The PAVN official history written after the war mentions only C306 Local Force Company specifically by name during its recount of the battle, although it does allude to the presence of other units. See Van Thai 2002, p. 176.
- ^ Quyết Thắng means "resolve to win".
- ^ Neither Westmoreland nor McChristian referred to the operation in their end of tour reports, however. See McAulay 2007, p. 34.
- ^ The Australian teams were originally referred to as "ferrets". See Mangold and Penycate 1985, p. 56.
- Citations
- ^ McNeill 1993, p. 54.
- ^ McNeill 1993, pp. 53–67.
- ^ McNeill 1993, pp. 63–67.
- ^ McNeill 1993, p. 67.
- ^ Mangold and Penycate 1985, pp. 43–44.
- ^ Dennis et al 2008, p. 555.
- ^ a b McAulay 2005, p. 4.
- ^ Faley 1999, pp. 34–36.
- ^ McNeill 1993, p. 65.
- ^ Breen 1988, p. 12.
- ^ McNeill 1993, pp. 85–109.
- ^ Coulthard-Clark 2001, pp. 277–279.
- ^ Faley 1999, p. 36.
- ^ a b c Coulthard-Clark 2001, p. 279.
- ^ McNeill 1993, p. 165.
- ^ McAulay 2005, pp. 89–90.
- ^ a b c Arnett 1977, p. 4.
- ^ Mangold and Penycate 1985, p. 46.
- ^ a b Ham 2008, p. 152.
- ^ a b c McNeill 1993, p. 166.
- ^ a b c McNeill 1993, p. 442.
- ^ Breen 1988, p. 176.
- ^ Faley 1999, p. 40.
- ^ MacGregor and Thomson 1993, p. 102.
- ^ a b Ham 2008, pp. 152–153.
- ^ a b "Tunnel Rats: 1 Field Squadron RAE". 1 Field Squadron Group RAE QLD Inc. 2007. http://www.1fieldsappers.org/files/page.php?p=22. Retrieved 29 November 2010.
- ^ a b Carland 2000, p. 170.
- ^ a b c d e f g h i j k l m n o Coulthard-Clark 2001, p. 280.
- ^ a b Ham 2008, p. 155.
- ^ McNeill 1993, p. 167
- ^ a b Carland 2000, p. 172.
- ^ Ham 2008, p. 156.
- ^ McAulay 2005, p. 90.
- ^ Breen 1988, p. 189.
- ^ McNeill 1993, pp. 166–167.
- ^ Breen 1988, p. 190.
- ^ McAulay 2005, p. 41.
- ^ Ham 2008, p. 157.
- ^ Ham 2008, p. 153.
- ^ a b c d New York Times 1966, p. 3.
- ^ a b MacGregor and Thomson 1993, p. 126.
- ^ a b c d Carland 2000, p. 171.
- ^ a b c d Carland 2000, p. 173.
- ^ a b c d e Breen 1988, p. 193.
- ^ Mohr 1966, p. 3.
- ^ a b McNeill 1993, p. 168.
- ^ McAulay 2005, pp. 129–135.
- ^ McAulay 2005, pp. 135–136.
- ^ a b McAulay 2005, p. 137.
- ^ a b c d Ham 2008, p. 154.
- ^ Mangold and Penycate 1985, p. 50.
- ^ Mangold and Penycate 1985, p. 48.
- ^ a b c Sullivan 2008, p. B06.
- ^ a b Mangold and Penycate 1985, p. 53.
- ^ McAulay 2005, p. 168.
- ^ McAulay 2005, p. 143.
- ^ McAulay 2005, pp. 228–231.
- ^ The Evening Independent 1966, p. 10.
- ^ McAulay 2005, p. 145.
- ^ McAulay 2005, pp. 143–144.
- ^ McAulay 2005, p. 146.
- ^ Breen 1988, pp. 194–195.
- ^ McAulay 2005, p. 161 and p. 228.
- ^ McAulay 2005, p. 173.
- ^ MacGregor and Thomson 1993, pp. 125–126.
- ^ a b Breen 1988, p. 196.
- ^ McNeill 1993, p. 443.
- ^ Bradley 2006, p. 16.
- ^ Horner 2008, p. 175.
- ^ McAulay 2007, p. 34.
- ^ Mangold and Penycate 1985, p. 57.
- ^ Mangold and Penycate 1985, pp. 101–102.
- ^ Van Thai 2002, p. 176.
- ^ McAulay 2005, p. 200.
- ^ Ang 2002, p. 104.
- ^ Mangold and Penycate 1985, p. 60.
- ^ McNeill 1993, p. 66.
- ^ McNeill 1993, p. 171.
- ^ Horner 2008, p. 177.
- ^ Dennis et al 2008, p. 556.
- ^ McNeill 1993, p. 164.
- ^ McNeill 1993, p. 169.
- ^ McAulay 2005, pp. 232–234.
- ^ McAulay 2005, p. 235.
References
- "Vast tunnel system found". New York Times: p. 3. 10 January 1966. http://select.nytimes.com/gst/abstract.html?res=F70812FB3A5F1A7493C2A8178AD85F428685F9. Retrieved 27 May 2010.
- "Viet Cong feel pinch of Operation Crimp". The Evening Independent: p. 10. 11 January 1966. http://news.google.com/newspapers?id=Q9oLAAAAIBAJ&sjid=T1cDAAAAIBAJ&pg=4324,1717693&dq=operation+crimp&hl=en. Retrieved 27 January 2010.
- Ang, Cheng (2002). The Vietnam War from the Other Side: the Vietnamese Communists' Perspective. London: Routledge. ISBN 0700716157.
- Arnett, Peter (14 October 1977). "Widow, Viet Cong officer remembers death tunnels". The Dispatch: p. 4. http://news.google.com/newspapers?nid=1734&dat=19771014&id=KVAcAAAAIBAJ&sjid=i1EEAAAAIBAJ&pg=6413,4434044. Retrieved 27 May 2010.
- Bradley, James (2006). The 173rd Airborne Brigade: Sky Soldiers (Third ed.). Nashville, TA: Turner Publishing Company. ISBN 1596520167.
- Breen, Bob (1988). First to Fight: Australian Diggers, NZ Kiwis and US Paratroopers in Vietnam, 1965–66. Nashville, TA: The Battery Press. ISBN 0898391261.
- Carland, John (2000). Stemming the Tide: May 1965 to October 1966. The United States Army in Vietnam. Washington, D.C.: Center of Military History, US Army. ISBN 1931641242.
- Coulthard-Clark, Chris (2001). The Encyclopaedia of Australia's Battles (Second ed.). Crows Nest, NSW: Allen and Unwin. ISBN 1865086347.
- Dennis, Peter; Grey, Jeffrey; Morris, Ewan; Prior, Robin; and Jean Bou (2008). The Oxford Companion to Australian Military History (Second ed.). Melbourne, VIC: Oxford University Press. ISBN 9780195517842.
- Faley, Thomas (1999). "Operation Marauder: Allied Offensive in the Mekong Delta". Vietnam 11 (5): 34–40. ISSN 1046-2902.
- Ham, Paul (2007). Vietnam: The Australian War. Sydney, NSW: Harper Collins. ISBN 9780732282370.
- Horner, David; ed (2008). Duty First: A History of the Royal Australian Regiment (Second ed.). Crows Nest, NSW: Allen and Unwin. ISBN 9781741753745.
- MacGregor, Sandy; Jimmy Thomson (1993). No Need for Heroes: The Aussies Who Discovered the Viet Cong's Secret Tunnels. Lindfield, NSW: CALM. ISBN 0646151673.
- Mangold, Tom; Penycate, John (1985). The Tunnels of Cu Chi. London: Pan Books. ISBN 0330291912. OCLC 13825759.
- McAulay, Lex (2005). Blue Lanyard, Red Banner: The Capture of a Vietcong Headquarters by 1st Battalion The Royal Australian Regiment Operation CRIMP 8–14 January 1966. Maryborough, QLD: Banner Books. ISBN 1875593284.
- McAulay, Lex (2007). "Found and Lost: The Buried Secrets for Victory in Vietnam?". Vietnam 20 (3): 28–35. ISSN 1046-2902.
- McNeill, Ian (1993). To Long Tan: The Australian Army and the Vietnam War 1950–1966. The Official History of Australia's Involvement in Southeast Asian Conflicts 1948–1975. St Leonards, NSW: Allen and Unwin. ISBN 1863732829.
- Mohr, Charles (11 January 1966). "Vietcong eluding two allied sweeps: Big forces find few foe—Koreans kill nearly 200". New York Times: p. 3. http://select.nytimes.com/gst/abstract.html?res=F50F1EFC3E5F16738DDDA80994D9405B868AF1D3. Retrieved 27 May 2010.
- Sullivan, Patricia (10 March 2008). "Robert Haldane, 83, His unit discovered the Cu Chi Tunnels". Washington Post: p. B06. http://www.washingtonpost.com/wp-dyn/content/article/2008/03/09/AR2008030901939.html. Retrieved 20 September 2009.
- Van Thai, Hoang (ed) (2002) [1988]. Victory in Vietnam: The Official History of the People's Army of Vietnam, 1954–1975, translated by Merle L. Pribbenow (English ed.). Lawrence, KS: University Press of Kansas. ISBN 0700611754.
Coordinates: 11°03′39.60″N 106°31′33.60″E / 11.061°N 106.526°E
Categories:- Conflicts in 1966
- 1966 in Vietnam
- Battles involving Vietnam
- Battles and operations of the Vietnam War
- Battles of the Vietnam War involving Australia
- Battles involving the United States


Wikimedia Foundation. 2010.