- Battle of Tarawa
-
Coordinates: 1°25′37.00″N 172°58′32.00″E / 1.42694°N 172.97556°E
Battle of Tarawa Part of World War II, Pacific War 
Lt Alexander Bonnyman (4th from right) and his assault party storming a Japanese stronghold. Bonnyman received the Medal of Honor posthumously.Date November 20 – 23, 1943 Location Betio, Tarawa Atoll Result American victory Belligerents  United States
 Empire of Japan
Commanders and leaders Julian C. Smith Keiji Shibazaki †
Strength 35,000 troops 2,619 troops,
1,000 Japanese and 1,200 Korean laborersCasualties and losses U.S Marine Corps:
1,009 killed[1]
2,101 wounded[2]
U.S Navy:
USS Liscome Bay (CVE-56), sunk 23 November 1943
687 killed[3]4,690 killed
17 soldiers captured
129 laborers captured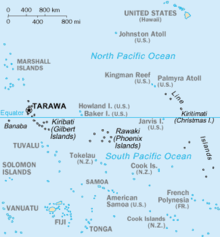 Map of Tarawa Atoll
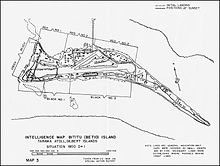 Map of Betio, Tarawa Atoll
 The insignia of the 2nd Marine Division "Follow Me".
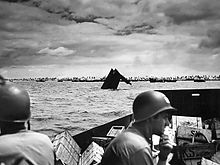
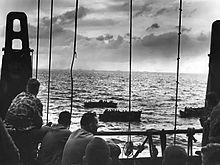 Combat transports at Tarawa
The Battle of Tarawa, code named Operation Galvanic, was a battle in the Pacific Theater of World War II, largely fought from November 20 to November 23, 1943. It was the first American offensive in the critical central Pacific region.
It was also the first time in the war that the United States faced serious Japanese opposition to an amphibious landing. Previous landings met little or no initial resistance. The 4,500 Japanese defenders were well-supplied and well-prepared, and they fought almost to the last man, exacting a heavy toll on the United States Marine Corps. The US had suffered similar casualties in other campaigns, for example over the six months in the campaign for Guadalcanal, but in this case the losses were suffered within the space of 76 hours. Nearly 6,000 Japanese and Americans died on the tiny island in the fighting.[4]
Contents
Background
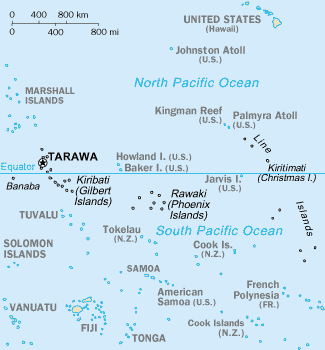
In order to set up forward air bases capable of supporting operations across the mid-Pacific, to the Philippines, and into Japan, the U.S. needed to take the Marianas Islands. The Marianas were heavily defended, and in order for attacks against them to succeed, land-based bombers would have to be used to weaken the defenses. The nearest islands capable of supporting such an effort were the Marshall Islands, northeast of Guadalcanal. Taking the Marshalls would provide the base needed to launch an offensive on the Marianas but the Marshalls were cut off from direct communications with Hawaii by a garrison on the small island of Betio, on the western side of Tarawa Atoll in the Gilbert Islands. Thus, to eventually launch an invasion of the Marianas, the battles had to start far to the east, at Tarawa.
Following the completion of their campaign on Guadalcanal, the 2nd Marine Division had been withdrawn to New Zealand for rest and recuperation. Losses were replaced and the men given a chance to recover from the malaria and other illnesses that weakened them through the fighting in the Solomons. On July 20, 1943 the Joint Chiefs directed Admiral Nimitz to prepare plans for an offensive operation in the Gilbert Islands. August saw Admiral Spruance fly down to New Zealand to meet with the new commander of the 2nd Marine Division, General Julian Smith, and initiate the planning of the invasion.
Following the Makin Island raid of August 1942, the Japanese command was aware of the strategic significance of the Gilberts, and had been working intensely for a year to fortify the island.[5] These preparations were ongoing right up to the day of the invasion. To aide the garrison in the construction of the defenses, the 1,247 men of the 111th Pioneers, similar to the Seabees of the U.S. Navy, along with the 970 men of the Fourth Fleet's construction battalion were brought in. Approximately 1,200 of the men in these two groups were Korean forced laborers. The garrison itself was made up of forces of the Imperial Japanese Navy. The Special Naval Landing Force was the marine component of the IJN, and were known by US intelligence to be more highly trained, had better discipline, better small unit leadership and were more tenancious than comparable units of the Imperial Japanese Army. The 3rd Special Base Defense Force assigned to Tarawa was the former 6th Yokosuka Special Naval Landing Force, and had a strength of 1,112 men. The 7th Sasebo Special Naval Landing Force was also stationed at Tarawa, with a strength of 1,497 men. It was commanded by Commander Takeo Sugai. This unit was bolstered by 14 Type 95 light tanks under the command of Ensign Ohtani.
A series of fourteen coastal defense guns, including four large Vickers 8-inch guns purchased from the British during the Russo-Japanese War,[4] were secured in concrete bunkers and located around the island to guard the open water and the approaches to the lagoon. It was thought these big guns would make it very difficult for a landing force to enter the lagoon and attack the island from the north side. The island had a total of 500 pillboxes or "stockades" built from logs and sand, many of which were reinforced with cement. Forty artillery pieces were scattered around the island in various reinforced firing pits. An airfield was cut into the bush straight down the center of the island. Trenches connected all points of the island, allowing troops to move where needed under cover. Kaigun Shōshō Keiji Shibazaki, who commanded the garrison, encouraged his troops in their defensive preparations, saying "it would take one million men one hundred years" to conquer Tarawa.
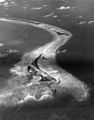
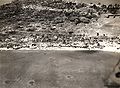
Located about 2,400 miles southwest of Pearl Harbor, Betio is the largest island in the Tarawa Atoll. The small, flat island lies at the southern most reach of the lagoon, and was home to the bulk of the Japanese defenders. Shaped roughly like a long, thin triangle, the tiny island is approximately two miles long. It is narrow, being only 800 yards wide at the widest point. A long pier was constructed from the north shore from which cargo ships could unload out past the shallows while at anchor in the protection of the lagoon. The northern coast of the island faces into the lagoon, while the southern and western sides face the deep waters of the open ocean. As a number of large coastal guns were mounted to protect the approaches into the lagoon, an attack on the island was anticipated to come from the open waters of the western or southern beaches.
The battle
November 20
 Marines alongside an LVT-1 "Alligator".
The American invasion force to the Gilberts was the largest yet assembled for a single operation in the Pacific, consisting of 17 aircraft carriers (6 CVs, 5 CVLs, and 6 CVEs), 12 battleships, 8 heavy cruisers, 4 light cruisers, 66 destroyers, and 36 transport ships. On board the transports was the 2nd Marine Division and a part of the army's 27th Infantry Division, for a total of about 35,000 troops.
As the invasion flotilla hove to in the predawn hours, the islands four 8 inch guns opened fire on the task force. A gunnery duel soon developed as the main batteries on the Colorado and Maryland commenced a counter-battery fire. The counter-battery proved accurate, with several of the 16 inch shells finding their mark, one igniting a huge explosion as the ammunition storage for one of the guns went up in a massive fireball. Three of the four guns were knocked out in short order. Though all four guns fell silent, one continued intermittent, though inaccurate, fire through the second day. The damage to the big guns left the approach to the lagoon open. It was one of the few successes of the naval bombardment.
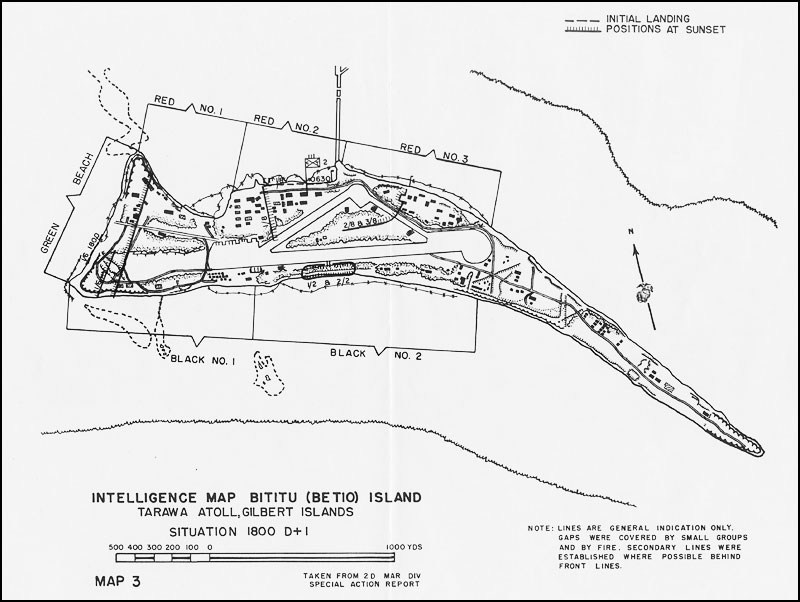
Following the gunnery duel and an air attack of the island at 0610, the naval bombardment of the island began in earnest and was sustained for the next three hours. Two mine sweepers with two destroyers to provide covering fire entered the lagoon in the pre-dawn hours and cleared the shallows of mines.[6] A guide light from one of the sweepers then guided the landing craft into the lagoon where they awaited the end of the bombardment. The plan was to land Marines on the north beaches, divided into three sections: Red Beach 1 to the far west of the island, Red Beach 2 in the center just west of the pier, and Red Beach 3 to the east of the pier. Green beach was a contingency landing beach on the western shoreline and was used for the D+1 landings. Black beaches 1 and 2 made up the southern shore of the island and were not used. The airstrip, running roughly east-west, divided the island into north and south.
The Marines started their attack from the lagoon at 09:00, thirty minutes later than expected, but found the tide had still not risen enough to allow their shallow draft Higgins boats to clear the reef. Marine battle planners had allowed for Betio's neap tide and expected the normal rising tide to provide a water depth of 5 feet (1.5 m) over the reef, allowing larger landing craft, with drafts of at least four feet (1.2 m), to pass with room to spare. But that day and the next, in the words of some observers, “the ocean just sat there,” leaving a mean depth of three feet (0.9 m) over the reef. (The neap tide phenomenon occurs twice a month when the moon is near its first or last quarter, because the countering tug of the sun causes water levels to deviate less. But for two days the moon was at its farthest point from earth and exerted even less pull, leaving the waters relatively undisturbed.)
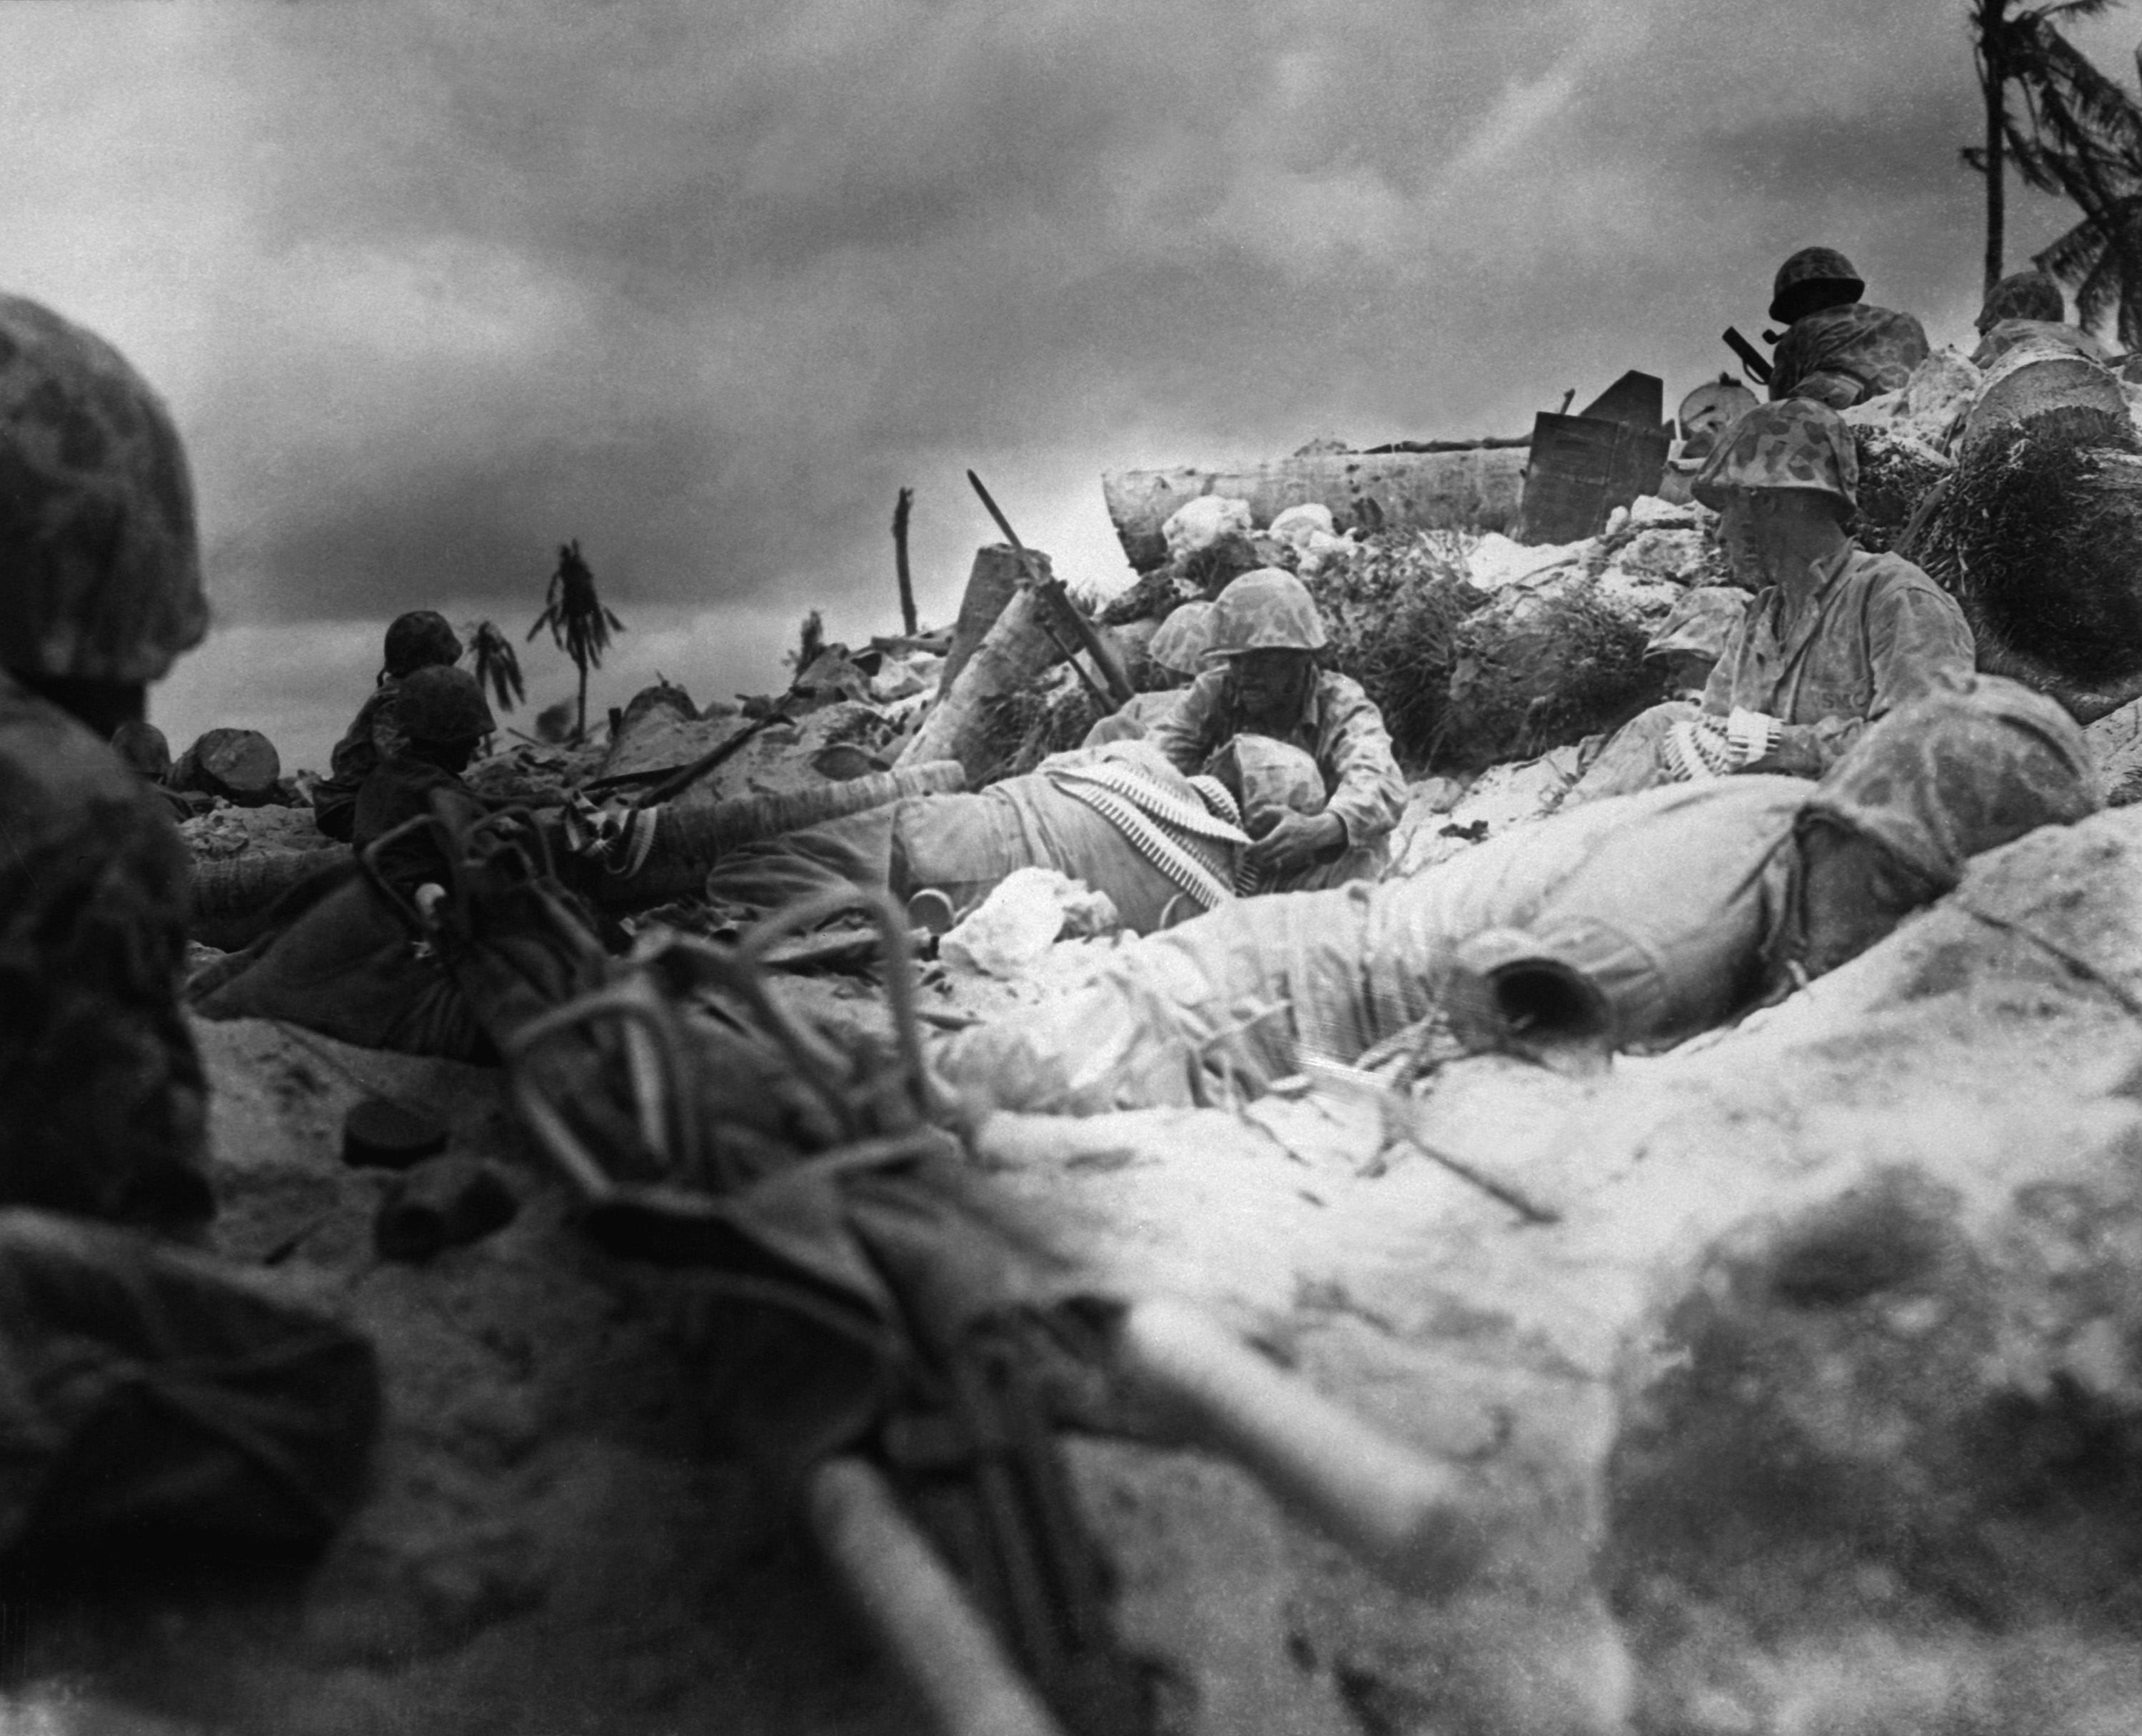
At 0900 the supporting naval bombardment was lifted to allow the Marines to land. The reef proved a daunting obstacle. Only the tracked LVT "Alligators" were able to get across. The Higgins boats, at four feet draft, were unable to clear the reef.[7] With the pause in the naval bombardment those Japanese that survived the shelling dusted themselves off and manned their firing pits. Japanese troops from the southern beaches were shifted up to the northern beaches. As the LVTs made their way over the reef and in to the shallows the number of Japanese troops in the firing pits slowly began to increase, and the amount of combined arms fire the LVTs faced gradually intensified. The LVTs had a myriad of holes punched through their non-armored hulls, and many were knocked out of the battle. Those 'Alligators' that did make it in proved unable to clear the sea wall, leaving the men in the first assault waves pinned down against the log wall along the beach. A number of 'Alligators' went back out to the reef in an attempt to carry in the men who were stuck there, but most of these LVTs were too badly holed to remain sea worthy, leaving the marines stuck on the reef some 500 yards (460 m) off shore. These men slowly began making their way in to the beach, wading through a withering fire from the shore. Half of the LVTs were knocked out of action by the end of the first day.
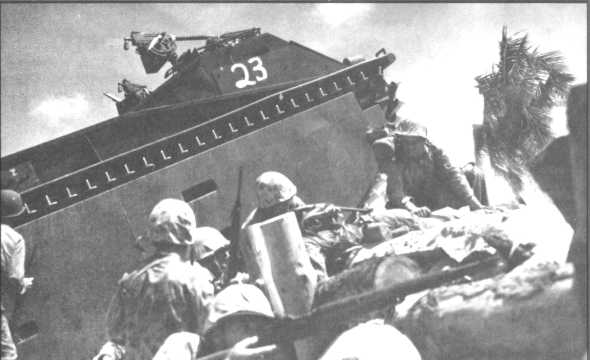
Several early attempts to land tanks for close support and to get past the sea wall failed when the landing craft carrying them were hit on their run into the beach and either sank outright or had to withdraw while taking on water. Two Stuart tanks eventually landed on the east end of the beach but were knocked out of action fairly quickly. Three medium Sherman tanks were landed on the western end of the island and helped push the line in to about 300 yards (270 m) from shore. One became stuck in a tank trap and another was knocked out by a magnetic mine. The remaining tank took a shell hit to its barrel and had its 75 mm gun disabled. It was used as a portable machine gun pillbox for the rest of the day. A third platoon was able to land all four of its tanks on Red 3 around noon and operated them successfully for much of the day, but by days end only one tank was still operable.
By noon the Marines had successfully taken the beach as far as the first line of Japanese defenses. By 15:30 the line had moved inland in places but was still generally along the first line of defenses. The arrival of the tanks started the line moving on Red 3 and the end of Red 2 (the right flank, looking south towards the island), and by nightfall the line was about half-way across the island, only a short distance from the main runway.
 Colonel David Shoup's command post on Red Beach 2.
The communication lines on the island had been laid shallow and were destroyed in the naval bombardment, effectively cutting commander Keiji Shibazaki off from command. In mid-afternoon he and his staff abandoned the command post at the west end of the airfield to allow it to be used for wounded and prepared to move to the south side of the island. He had ordered two of his Type 95 light tanks to act as a protective cover for the move. A naval 5" high explosive round exploded in their midst outside the central concrete command post, resulting in the death of the commander and most of his staff. His loss complicated Japanese command issues.[8][9]
As night fell on the first day the Japanese defenders kept up a sporadic harassing fire, but did not launch an attack on the Marines clinging to their beachhead. With Rear Admiral Shibasaki killed and their communication lines torn up, each unit was essentially acting in isolation, and had been since the naval bombardment had commenced. The Marines brought a battery of 75 mm Pack Howitzers ashore, unpacked them and set them up for action for the next days fight, but the bulk of the second wave was unable to land. They spent the night floating out in the lagoon without food or water, trying to sleep in their Higgins' boats. A number of Japanese marines slipped away in the night, swimming out to the Niminoa, a wrecked steamship lying west of the main pier, and to a number of the wrecked LVTs in the lagoon. There they laid in wait for dawn when they would fire upon the US forces from behind. The long night dragged on, but without direction the Japanese were unable to coordinated for a counterattack against the toe hold the Marines held on the island. The feared counterattack never came. At the end of the day, of the 5,000 Marines put ashore, 1,500 were dead or wounded.
November 21
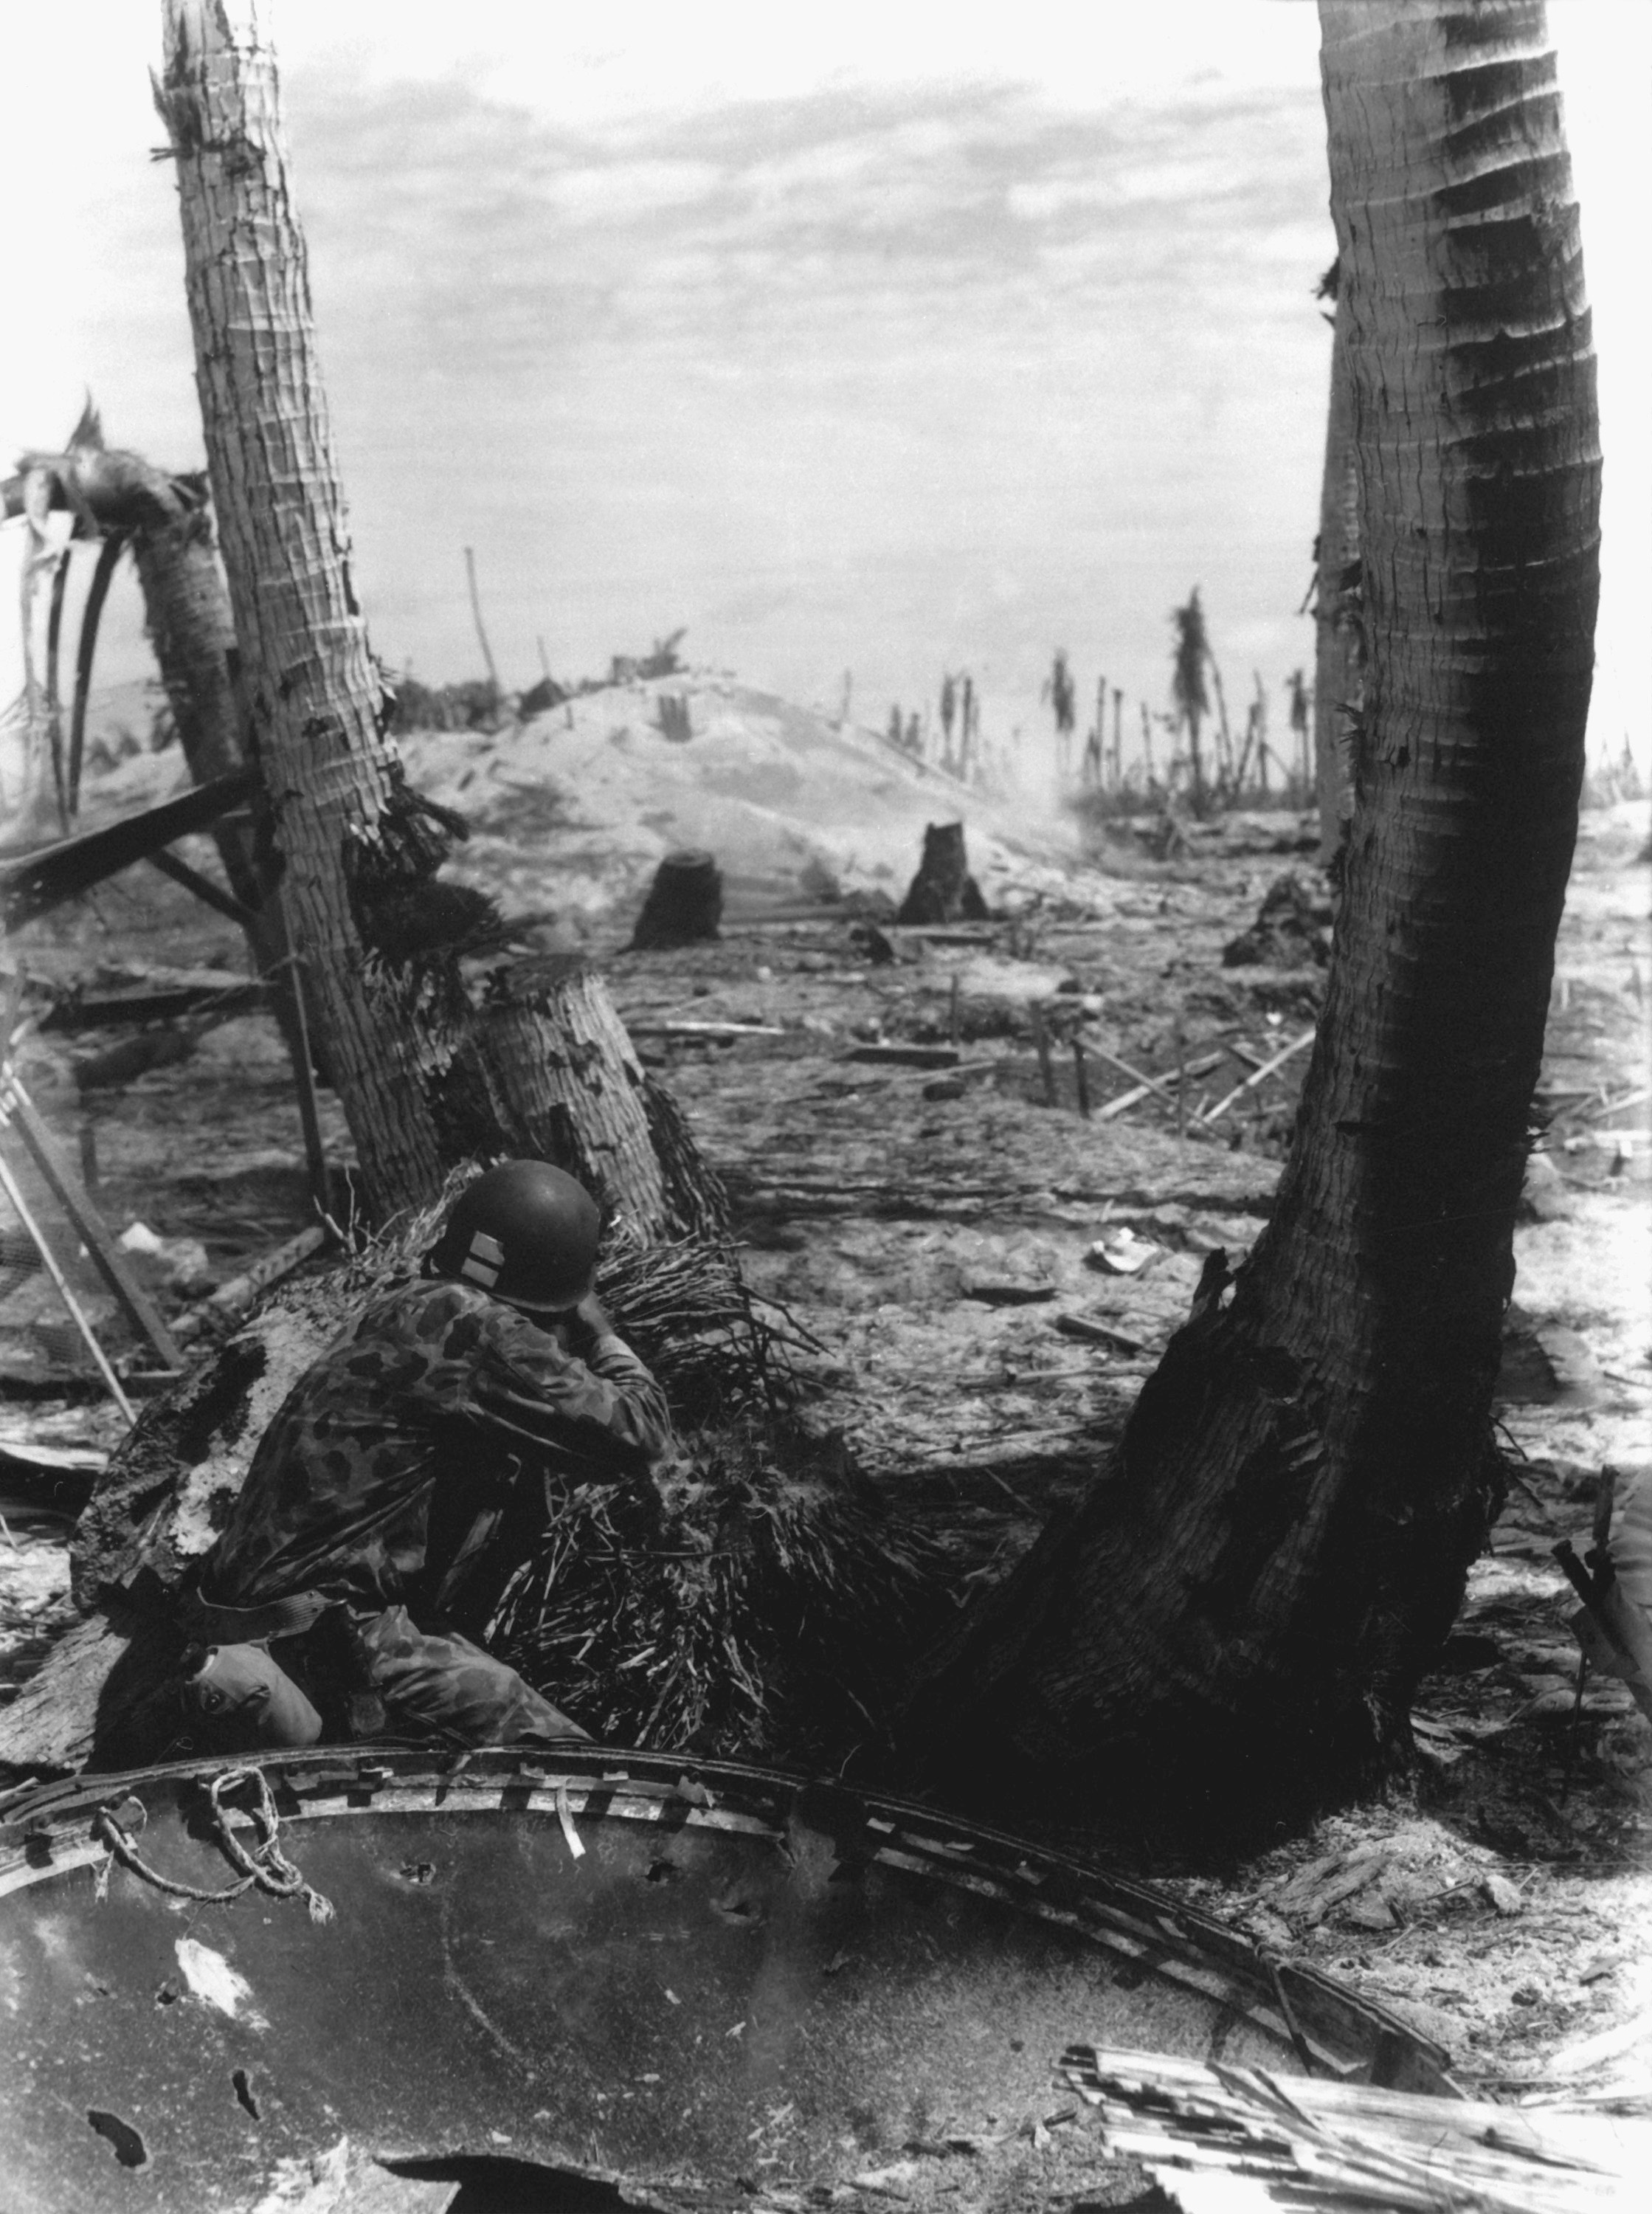
 A Marine fires on a Japanese pillbox.
With the Marines holding a line on the island, the focus of the second day turned to dividing the Japanese forces in two, by expanding the bulge near the airfield until it reached the southern shore. Meanwhile the forces on Red 1 were instructed to secure Green beach, the entire western end of the island.
In the end, taking Green proved somewhat easier than expected. With heavy resistance all through the area, the commander decided to avoid direct combat and instead called in naval fire from offshore. Inching their way forward during the day, the artillery spotters were able to take out machine gun posts and remaining defenses. After the fire stopped, the troops were able to take the positions in about an hour with few losses.
Operations along Red 2 and Red 3 were considerably more difficult. During the night the defenders had set up several new machine gun posts between the closest approach of the forces from the two beaches, and fire from those machine gun nests cut off the American forces from each other for some time. By noon the U.S. forces had brought up their own heavy machine guns, and the Japanese posts were put out of action. By the early afternoon they had crossed the airstrip and had occupied abandoned defensive works on the south side.
Around 12:30 a message arrived that some of the defenders were making their way across the sandbars from the extreme eastern end of the islet to Bairiki, the next islet over. Portions of the 6th Marine Regiment were then ordered to land on Bairiki to seal off the retreat path. They formed up, including tanks and pack artillery, and were able to start their landings at 16:55. They received machine gun fire, so aircraft were sent in to try to locate the guns and suppress them. The force landed with no further fire, and it was later found that only a single pillbox with 12 machine guns had been set up by the forces that had been assumed to be escaping. They had a small tank of gasoline in their pillbox, and when it was hit with fire from the aircraft the entire force was burned. Later, other units of the 6th were landed unopposed on Green Beach, north (near Red Beach 1).
By the end of the day, the entire western end of the island was in U.S. control, as well as a fairly continuous line between Red 2 and Red 3 around the airfield aprons. A separate group had moved across the airfield and set up a perimeter on the southern side, up against Black 2. The groups were not in contact with each other, with a gap of over 500 yards (460 m) between the forces at Red 1/Green and Red 2, and the lines on the northern side inland from Red 2/Red 3 were not continuous. Nevertheless, it is at this point that the U.S. began to gain the advantage.
November 22
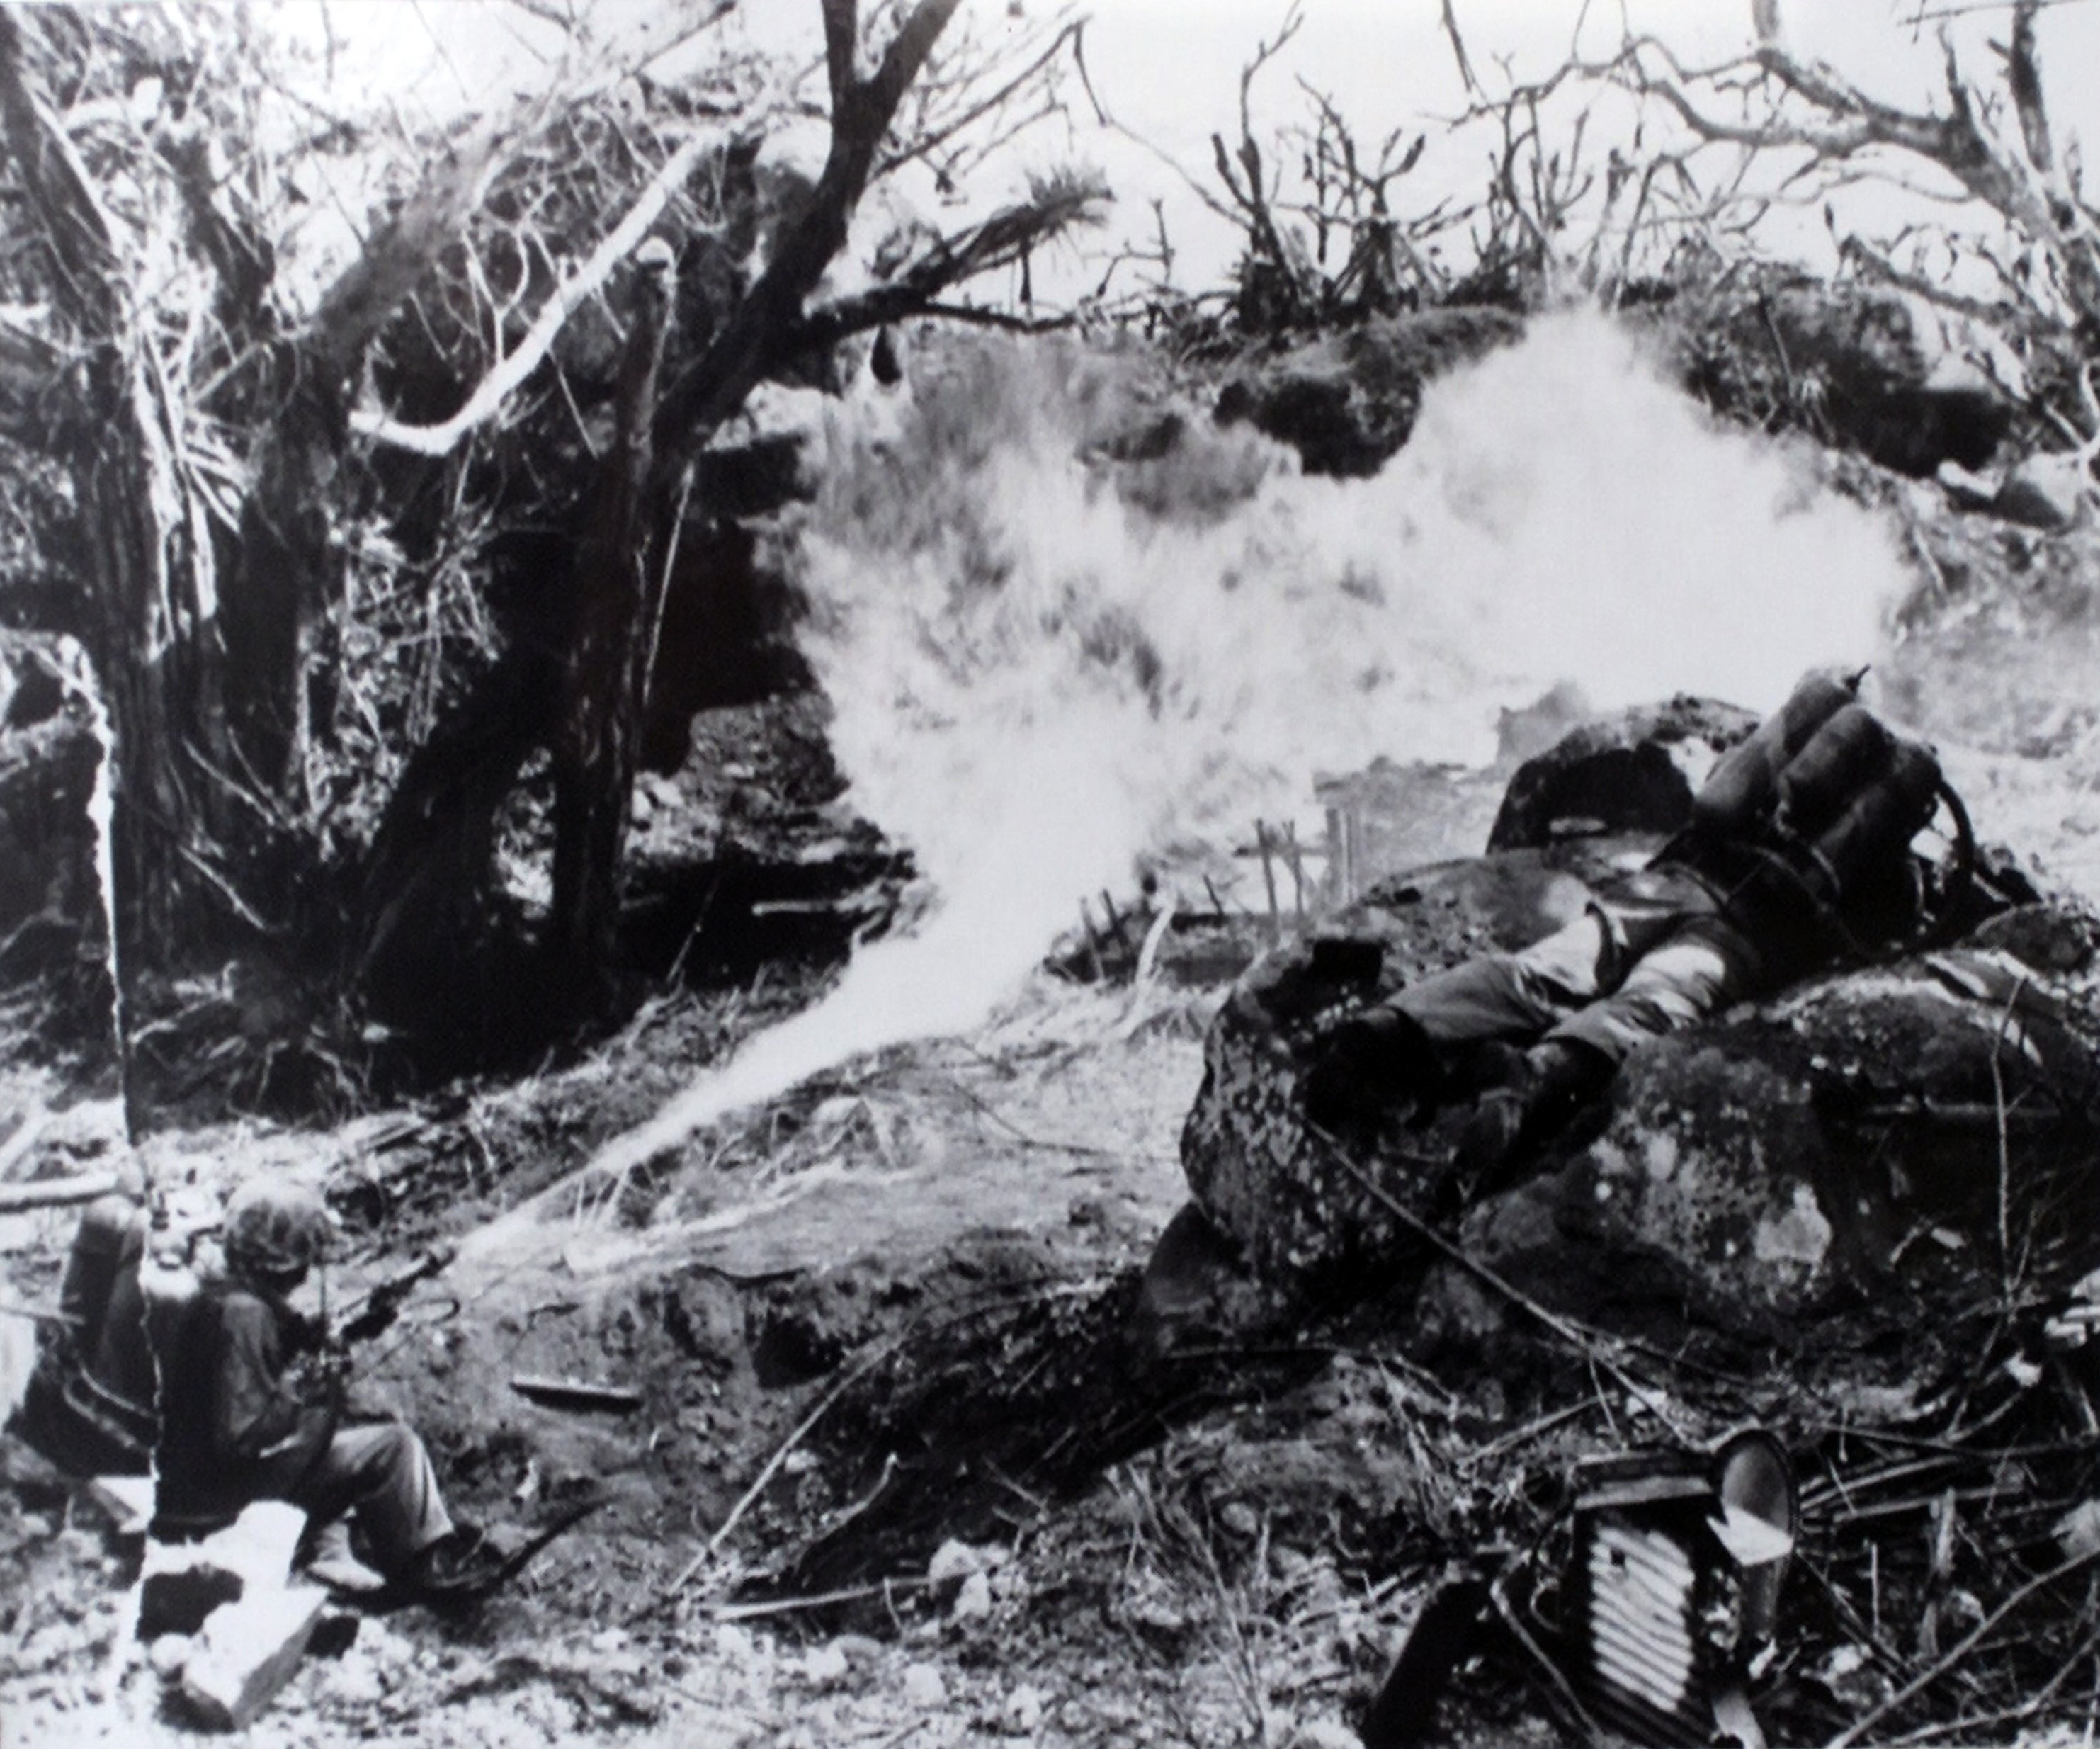
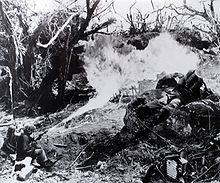 Two Marine flamethrowers clear an enemy strong point on Tarawa.
The third day of the battle consisted primarily of the consolidation of existing lines and the moving onshore of additional heavy equipment and tanks. During the morning the forces originally landed on Red 1 made some progress towards Red 2 but at some cost. Meanwhile the units of the 6th Marines landed on Green to the south of Red 1 formed up while the remaining battalion of the 6th landed.
By the afternoon the 1st Battalion 6th Marines was sufficiently organized and equipped to take the offensive. At 12:30 they started and were soon pursuing the Japanese forces across the southern coast of the island. By the late afternoon they had reached the eastern end of the airfield and formed a continuous line with the forces that had landed on Red 3 two days earlier.
By the evening, U.S. forces clearly had the upper hand. The remaining Japanese forces were either pushed back into the tiny amount of land to the east of the airstrip, or operating in several isolated pockets near Red 1/Red 2 and near the eastern edge of the airstrip.
Realizing this, the Japanese forces formed up for a counterattack, which started at about 19:30. Small units were sent in to infiltrate the U.S. lines in preparation for a full-scale assault but were beaten off by concentrated artillery fire, and the assault never took place. Another attempt was made at 23:00 and made some progress.
November 23
At 0400 the Japanese attacked Major Jones' 1st Battalion 6th Marines in force. Roughly 300 Japanese troops launched a banzai charge into the lines of A and B Companies. Receiving support from 1/10's 75mm pack howitzers and the destroyers USS Schroeder and USS Sigsbee, the Marines were able to beat back the attack but only after calling artillery to within 75 meters of their lines.[10] When the assault ended about an hour later there were 200 dead Japanese soldiers in the Marine front lines and another 125 beyond their lines. At 0700 navy fighters and dive bombers started softening up the Japanese positions on the eastern tip of the island. After 30 minutes of air attack the pack howitzers of 1/10 opened up on the Japanese positions. Fifteen minutes later the navy kicked off the last part of the bombardment with a further 15 minutes of shelling. At 0800 3/6 under the command of Lt. Col. McLeod attacked, Jones' 1/6 having been pulled off the line after suffering 45 killed and 128 wounded in the previous night's fighting. Due to the narrowing nature of the island, I and L Companies of 3/6 formed the entire Marine front with K Company in reserve. The Marines advanced quickly against the few Japanese left alive on the eastern tip of Betio. They had two Sherman tanks (the Colorado and the China Gal), 5 light tanks in support and engineers in direct support.[11]
I and L Companies advanced 350 yards before experiencing any serious resistance in the form of a number of connected bunkers on I Company's front. Lt. Col. McLeod ordered L Company to continue their advance, thereby bypassing the Japanese position. At this point L Company made up the entire front across the now 200 yard wide island, while I Company reduced the Japanese strong point with the support of the tank "Colorado" and attached demolition/flame thrower teams provided by the engineers. As the I Company Marines closed in the Japanese broke from cover and attempted to retreat down a narrow defile. Alerted to the attempted retreat, the commander of the Colorado fired in enfilade at the line of fleeing soldiers. The near total destruction of the Japanese soldiers' bodies made it impossible to know how many men were killed by this single shot but it was estimated that 50 to 75 men perished. While 3/6's L Company advanced down the eastern end of the island, Major Schoettel's 3/2 and Major Hay's 1/8 were cleaning out the Japanese pocket that still existed between beaches Red 1 and Red 2. This pocket had been resisting the advance of the Marines landing on Red 1 and Red 2 since D-day and they had not as of yet been able to move against it.[12]
1/8 advanced on the pocket from the east (Red 2) while 3/2 advanced from the west (Red 1). Major Hewitt Adams led an infantry platoon supported by two pack howitzers from the lagoon into the Japanese positions to complete the encirclement. By noon the pocket had been reduced. On the eastern end of the island 3/6's L Company continued to advance, bypassing pockets of resistance and leaving them to be cleared out by tanks, engineers and air support. By 1300 they had reached the eastern tip of Betio. 3/6 killed roughly 475 Japanese soldiers on the morning of D+3 while only losing 9 killed and 25 wounded. Back at the Red 1/Red 2 pocket there was no accurate count of Japanese dead. There were an estimated 1,000 Japanese alive and fighting on the night of D+2, 500 on the morning of D+3 and only 50-100 left when the island was declared secure at 1330 D+3.[13]
Aftermath
For the next several days the 2nd Battalion 6th Marines landed on Bairiki, moved up the remaining islands in the atoll to clean up, completing this on November 28. Portions of the 2nd Marine Division started leaving soon after and were completely withdrawn by early 1944.
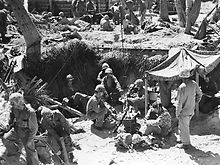
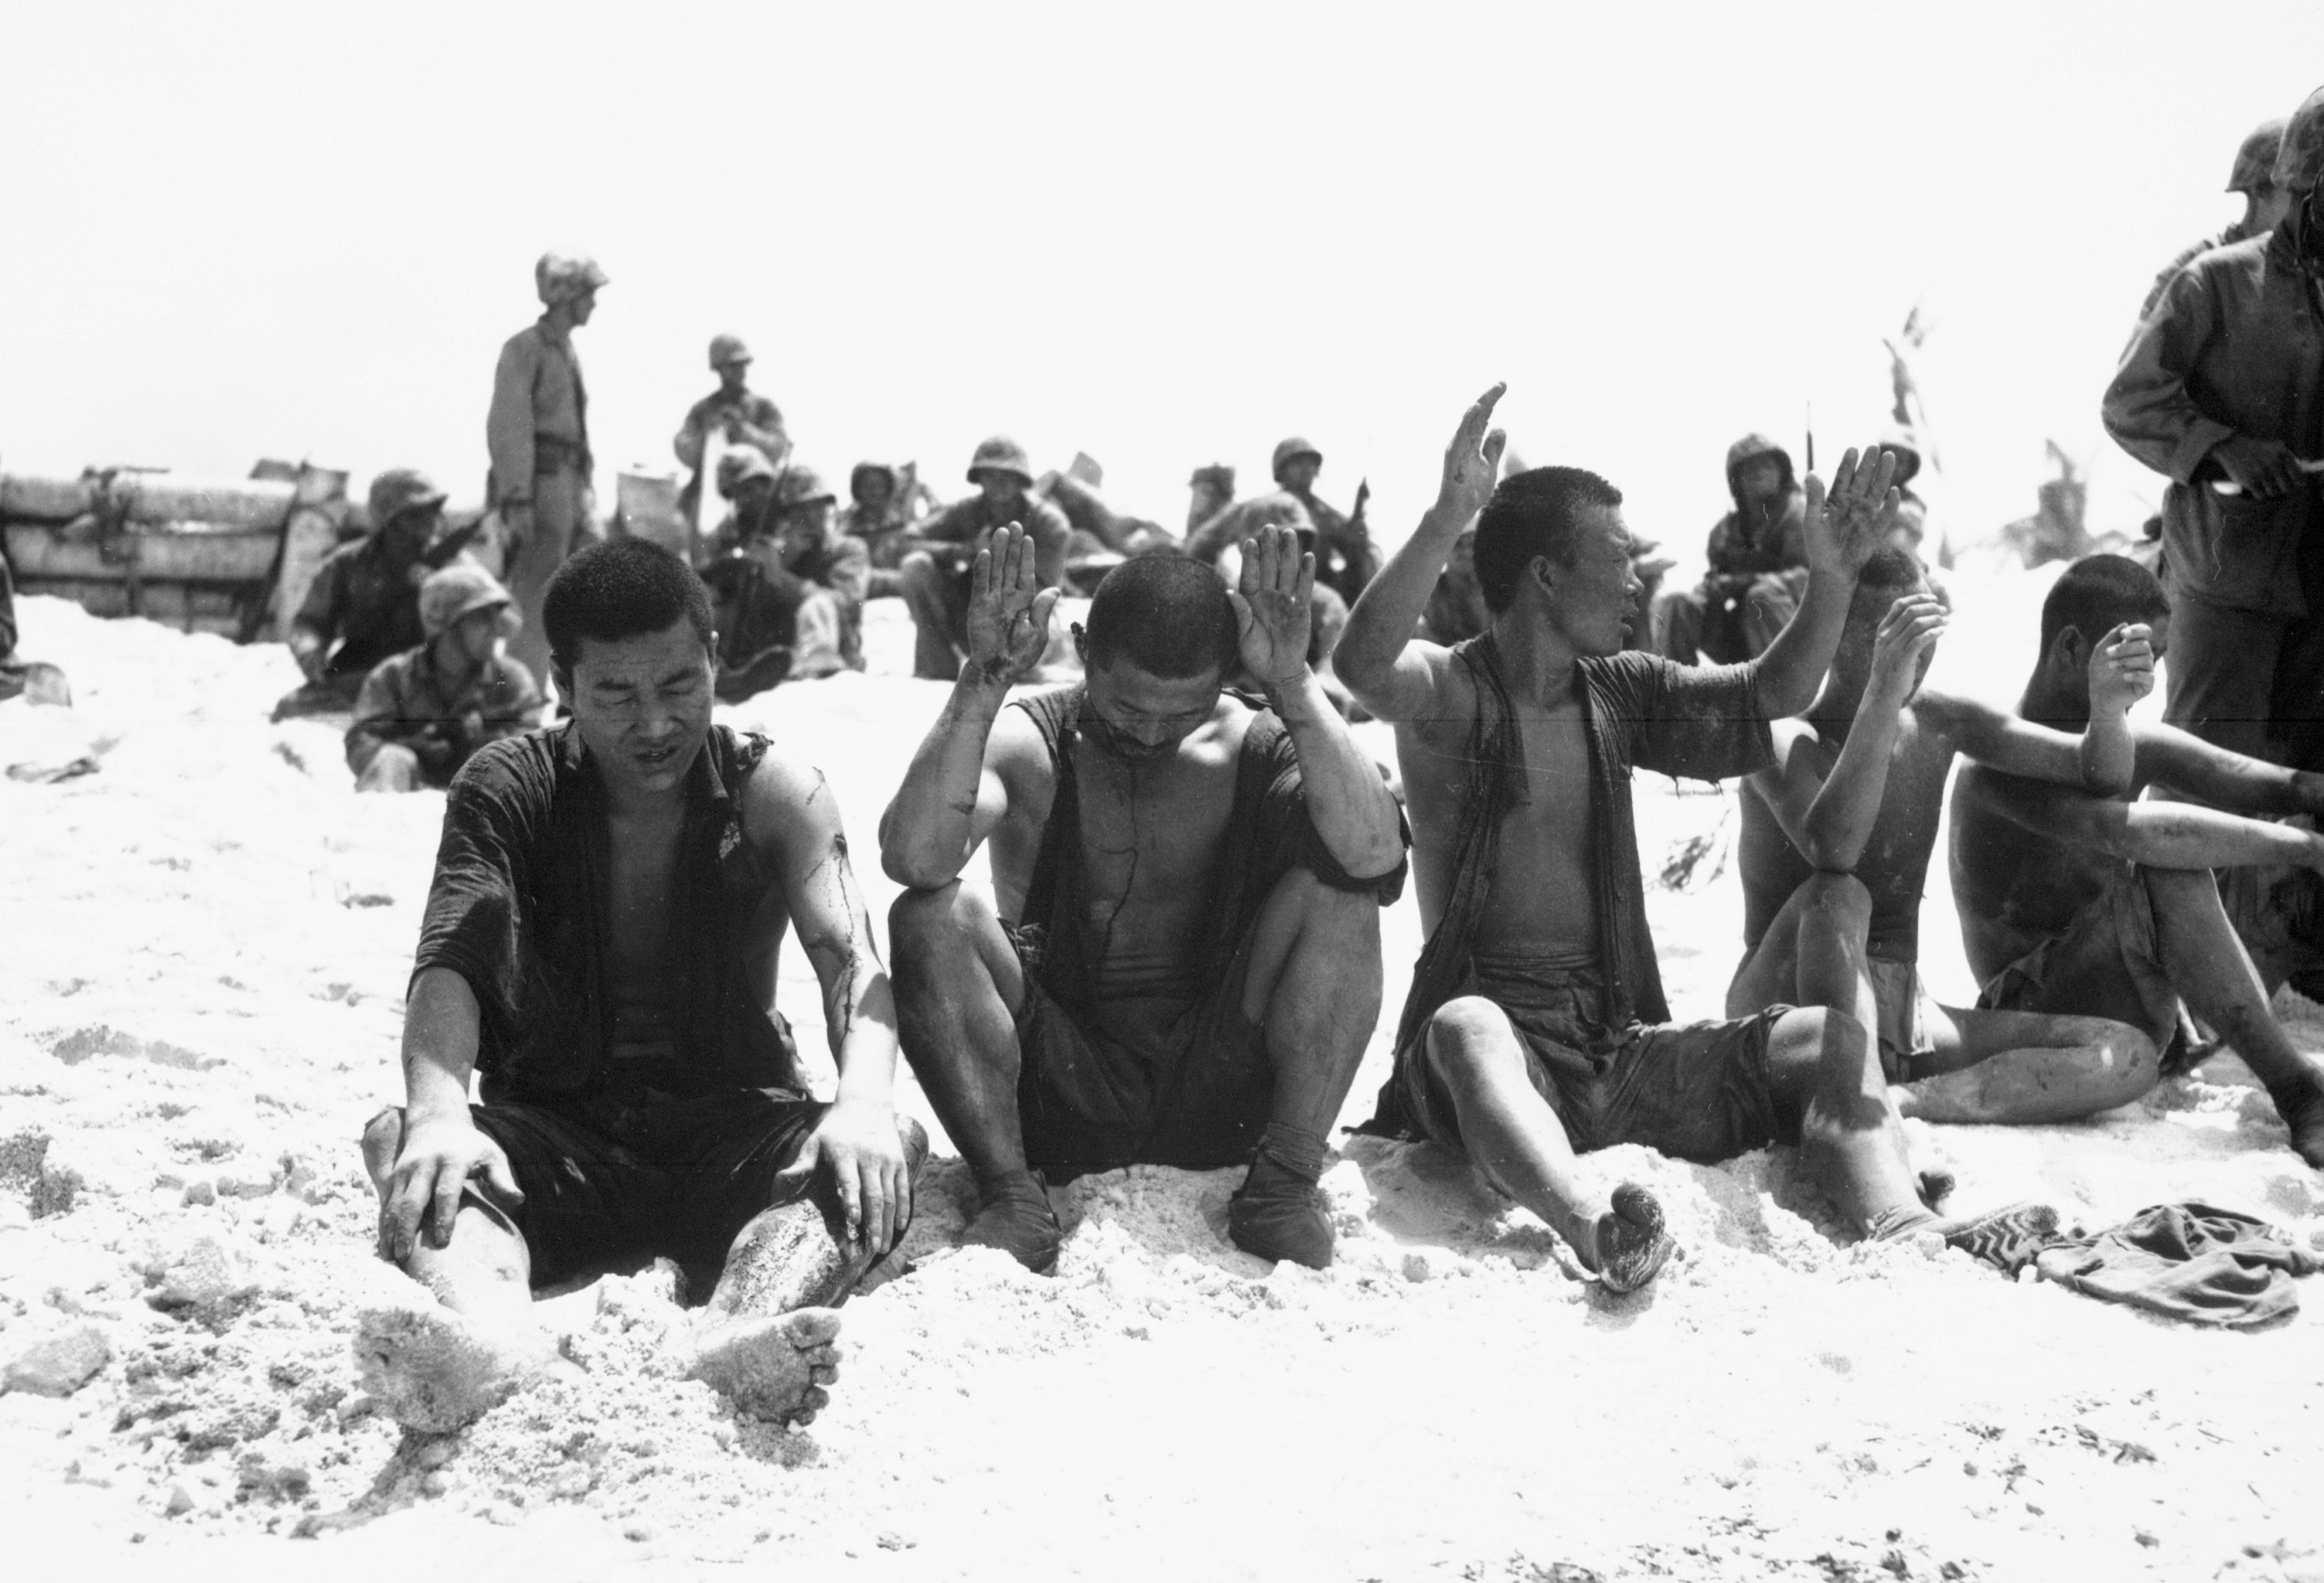
 Japanese prisoners of war.
Of the 3,636 Japanese that made up the garrison, only one officer and sixteen enlisted men were willing to surrender. And of the 1,200 Korean laborers that had been brought to Tarawa to construct the defenses, only 129 survived. All told, 4,690 of the island's defenders were killed.[14] The 2nd Marine Division suffered 894 killed in action, 48 officers and 846 enlisted men, with another 84 of the survivors later succumbing to their wounds, of whom 8 were officers and 76 were enlisted men. A further 2,188 (102 officers and 2,086 men) men were wounded in the battle. Of the roughly 12,000 2nd Marine Division marines on Tarawa, 3,166 officers and men became casualties.[15] Nearly all of these casualties were suffered in the 76 hours between H-hour+10 Minutes, 0910 20 November, and the island of Betio being declared secure at 1330 23 November.[16]
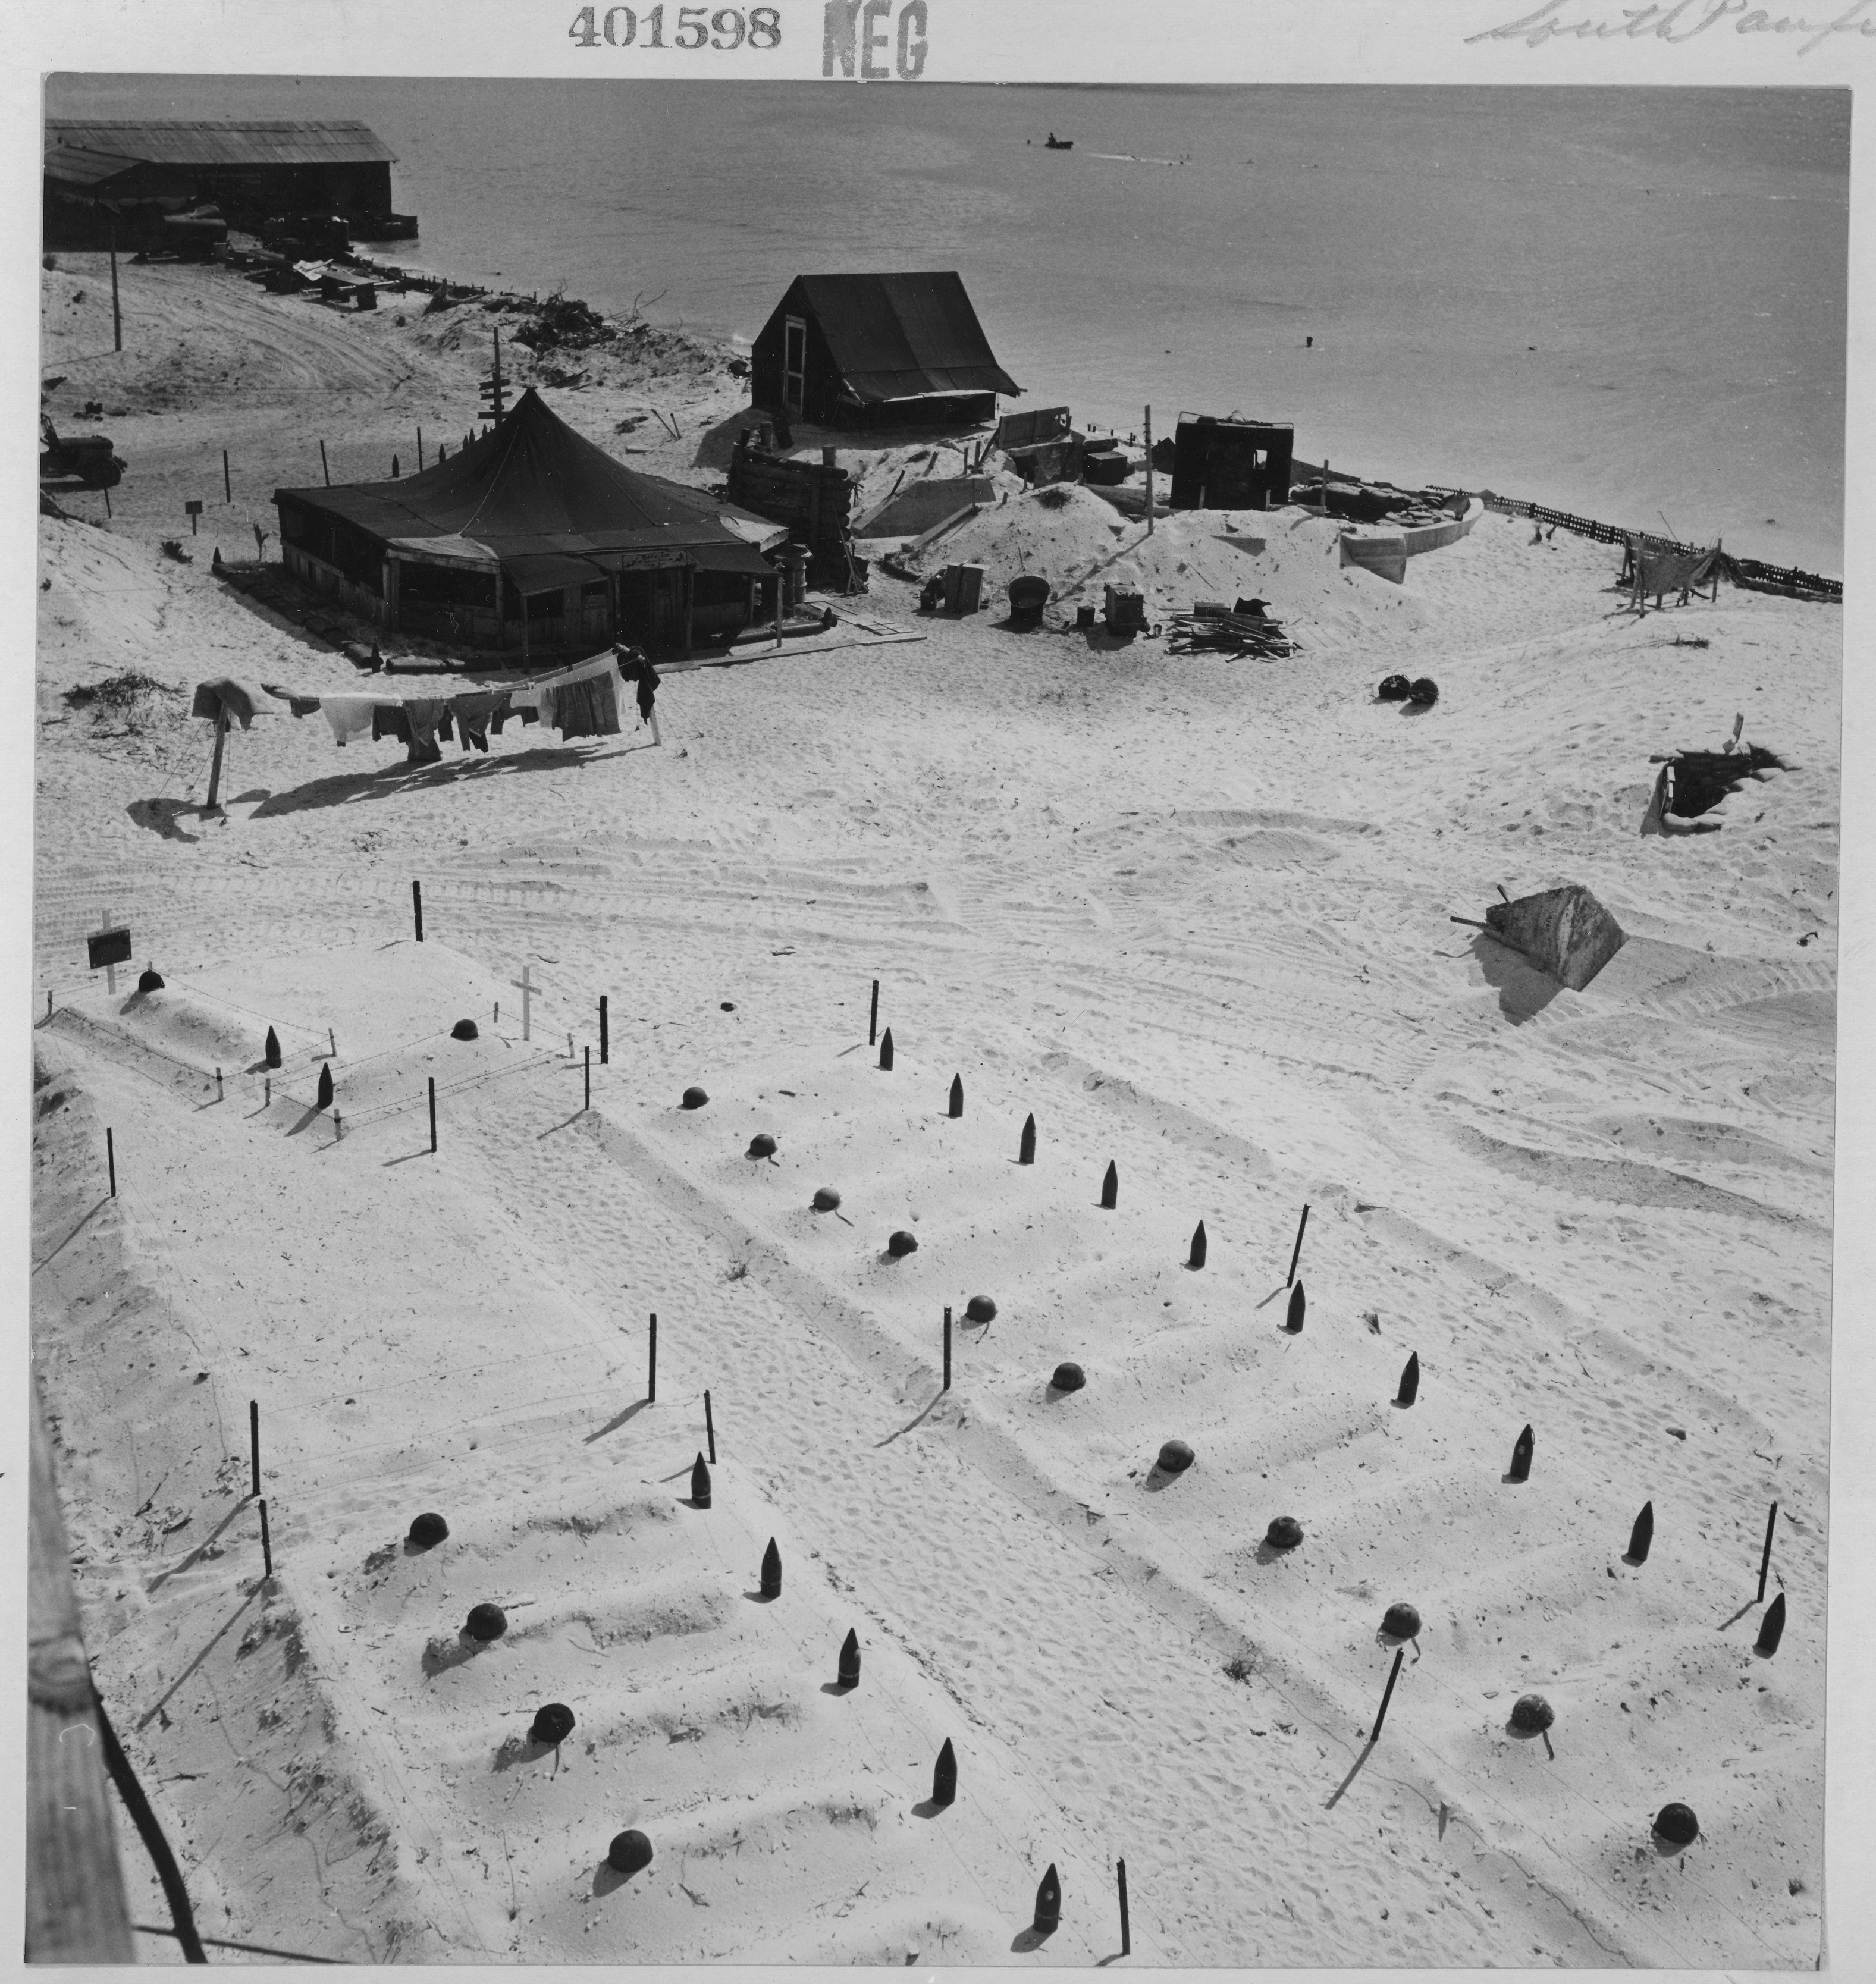
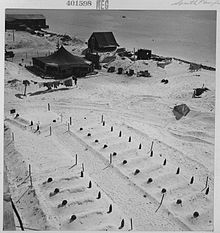 Empty helmets and spent artillery shells mark the graves of Marines who fell at Tarawa, March 1944.
The heavy casualties suffered at Tarawa sparked off public protest in the United States, where headline reports of the high losses could not be understood for such a small and seemingly unimportant island.[4][17] The public reaction was aggravated by the unguardedly frank comments of some of the Marine Corps command. General Holland M. Smith, commander of the V Amphibious Corps who had toured the beaches after the battle, likened the losses to Pickett's Charge at Gettysberg.
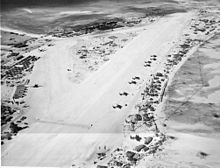 Long range aircraft at Hawkins Field on Betio (Tarawa Atoll) March 1944.
Back in Washington newly appointed Marine Corps Commandant General Alexander Vandegrift, the widely respected and highly decorated veteran of Guadalcanal, reassured Congress, pointing out that "Tarawa was an assault from beginning to end." The New York Times ran an editorial in the 27 December 1943 issue praising the Marines for overcoming Tarawa's rugged defenses and fanatical garrison, and warned that future assaults in the Marshalls might well result in heavier losses. "We must steel ourselves now to pay that price."[4]
Writing after the war, General Holland Smith, who was highly critical of the Navy in his biography, commented:
"Was Tarawa worth it? My answer is unqualified: No. From the very beginning the decision of the Joint Chiefs to seize Tarawa was a mistake and from their initial mistake grew the terrible drama of errors, errors of omission rather than commission, resulting in these needless casualties."[18]
A number of commanders involved, including Admiral Chester Nimitz, Admiral Raymond Spruance, Lt General Julian Smith and Lt Colonel David Shoup disagreed with that assessment.[4] Said Nimitz:
"The capture of Tarawa knocked down the front door to the Japanese defenses in the Central Pacific."[4]
Nimitz launched the Marshalls campaign only 10 weeks after the seizure of Tarawa. Aircraft flown from airfields at Betio and Apamama proved invaluable. Of greater significance to success in the Marshalls were the lessons learned from the battle itself.
The losses at Tarawa resulted from a number of contributing factors, among which were the inability of a brief naval bombardment to weaken the defenses of a well entrenched enemy, the miscalculation of the low tide and the height of the obstructing coral reefs, the operational short comings of the landing craft available, and the difficulties of coordinating and communicating between the different forces involved. It was the first time in the war that a United States amphibious landing was opposed by well entrenched, determined defenders. Previous landings, such as the landing at Guadalcanal, had been unexpected and met with little or no initial resistance. The 4,500 Japanese on Tarawa were well-supplied and well-prepared. They fought almost to the last man, exacting a heavy toll on the Marines who took the island. The US had suffered similar casualties in other campaigns, notably Guadalcanal over five months of fighting, but never such numbers in such a short period of time. At the time, Tarawa was the most heavily defended atoll invaded by Allied forces in the Pacific.[19]
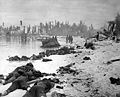
All told nearly 6,000 Japanese and Americans died on the tiny island in 76 hours of fighting.[4] In the aftermath of the battle, American casualties lined the beach and floated in the surf. Over a hundred were never repatriated.[20] Staff Sgt Norman T. Hatch and other Marine cameramen were present obtaining footage that would later be used in a documentary.[21] "With the Marines at Tarawa" contained scenes of American dead so disturbing that the decision of whether or not to release it to the public was deferred to President Franklin Delano Roosevelt.
The lessons learned at Tarawa would be applied to all subsequent amphibious assaults as the United States worked its way across the Central Pacific. Following the battle the 2nd Marine Division was shipped to Hawaii, leaving the 2nd Battalion, 6th Marine Regiment behind to clear the battlefield of ordinance, provide security for the Seabees rebuilding the airstrip and aide in the burial detail. The 2nd Marine Division would remain in Hawaii for six months, refitting and training, until called upon for its next major amphibious landing, the Battle of Saipan in the Marianas in June of 1944.
Last week some 2,000 or 3,000 United States Marines, most of them now dead or wounded, gave the nation a name to stand beside those of Concord Bridge, the Bon Homme Richard, the Alamo, Little Big Horn, and Belleau Wood. The name was Tarawa.
—Robert Sherrod, Time Magazine War Correspondent, 6 December, 1943 [22]
Gallery
-
-

-

-

-
-
-
-
-

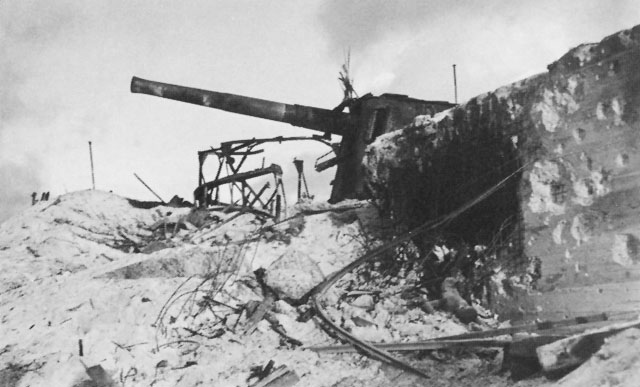
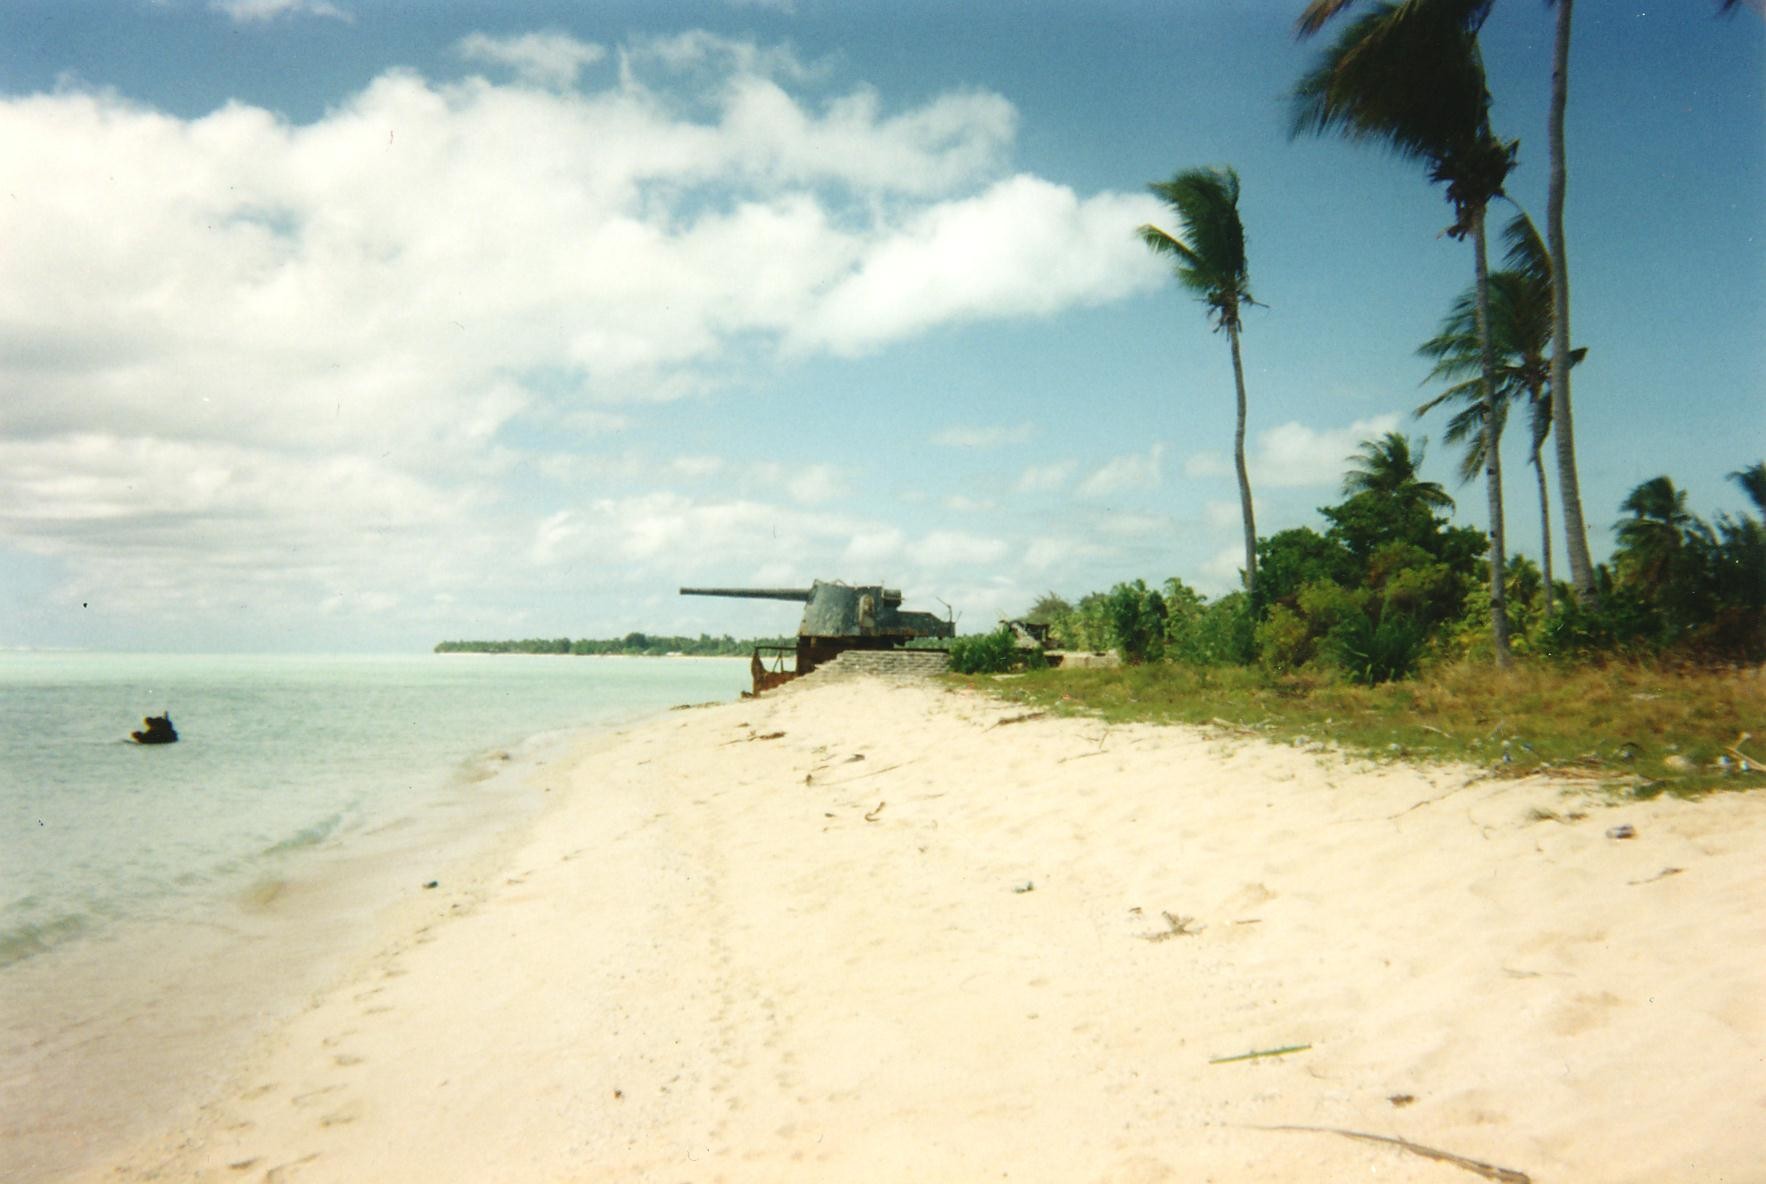
Japanese 8 inch gun emplacement on Tarawa.
-
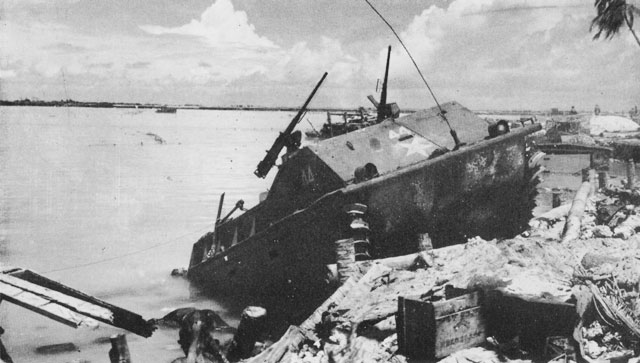
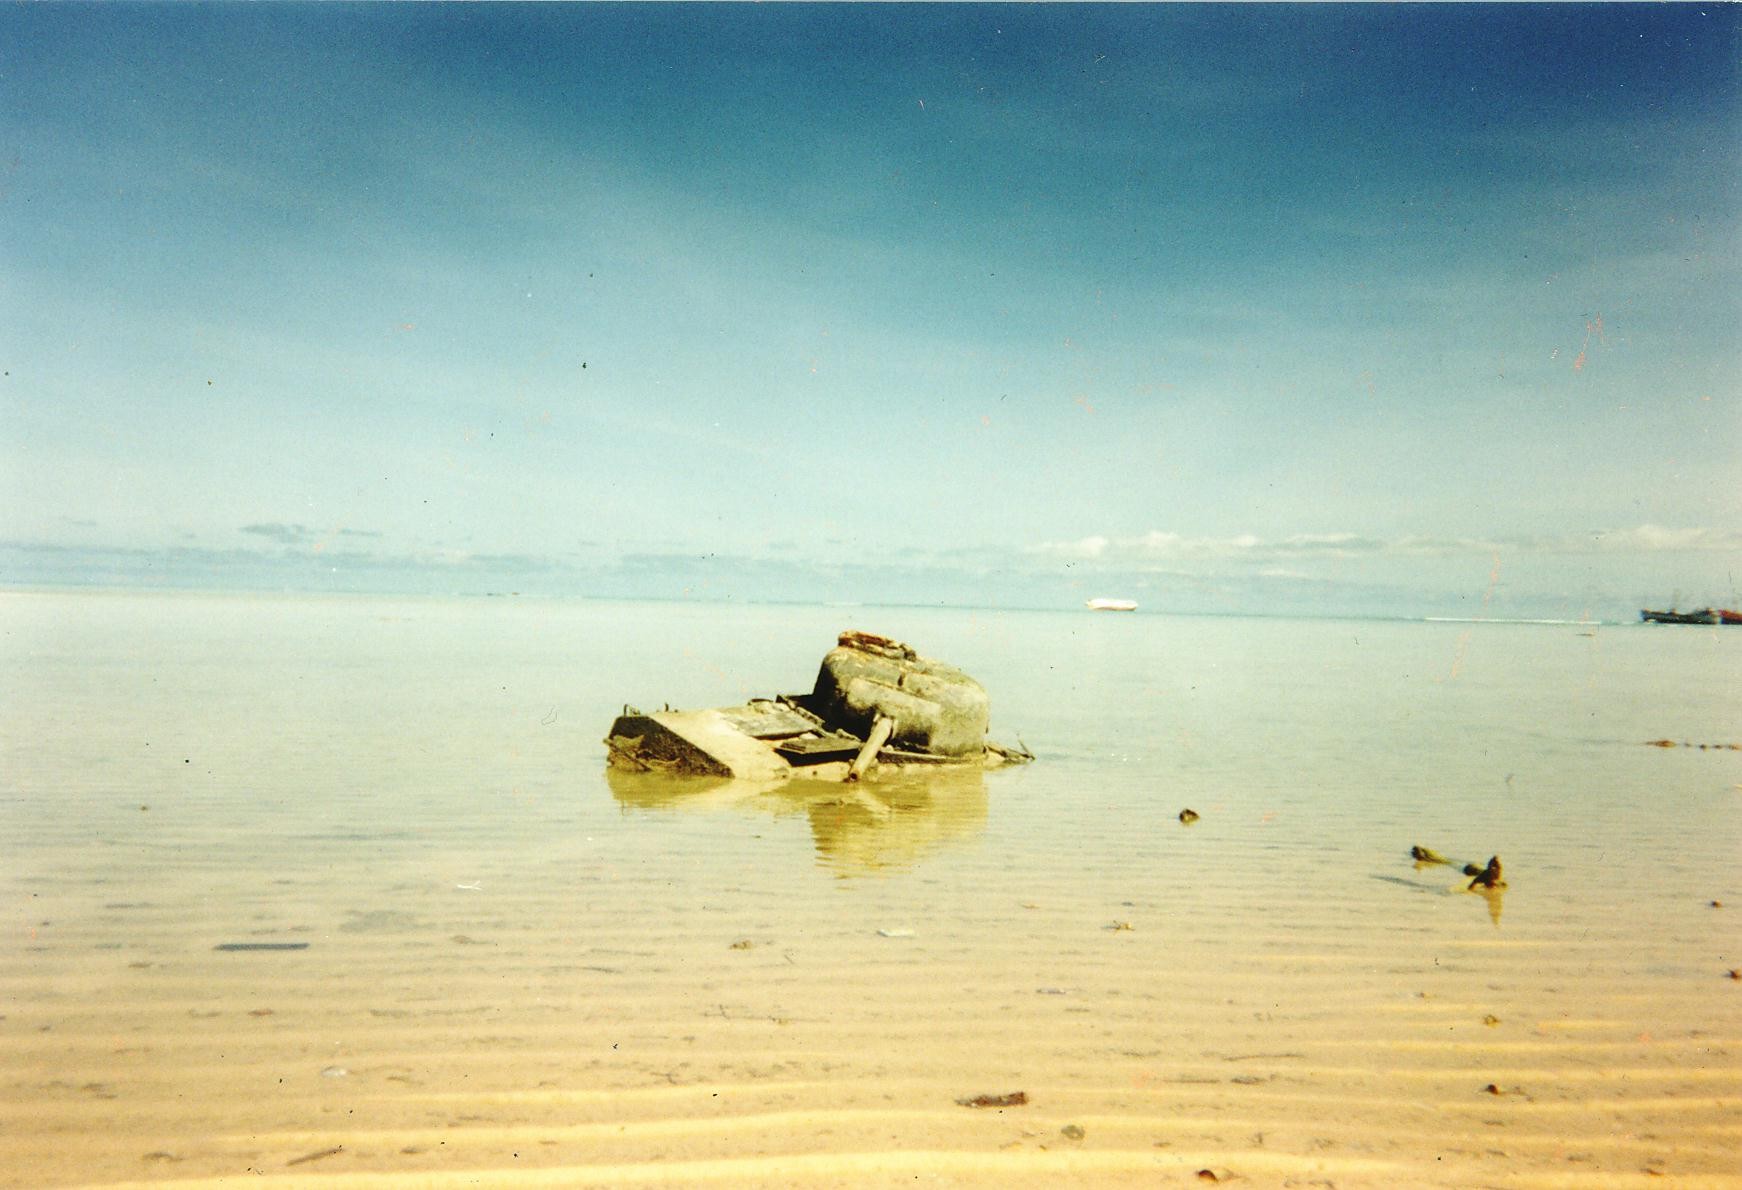
An M4 Sherman rests in the lagoon.
-

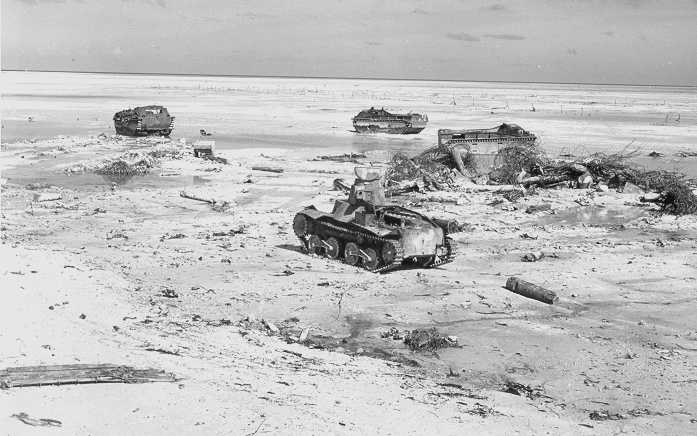
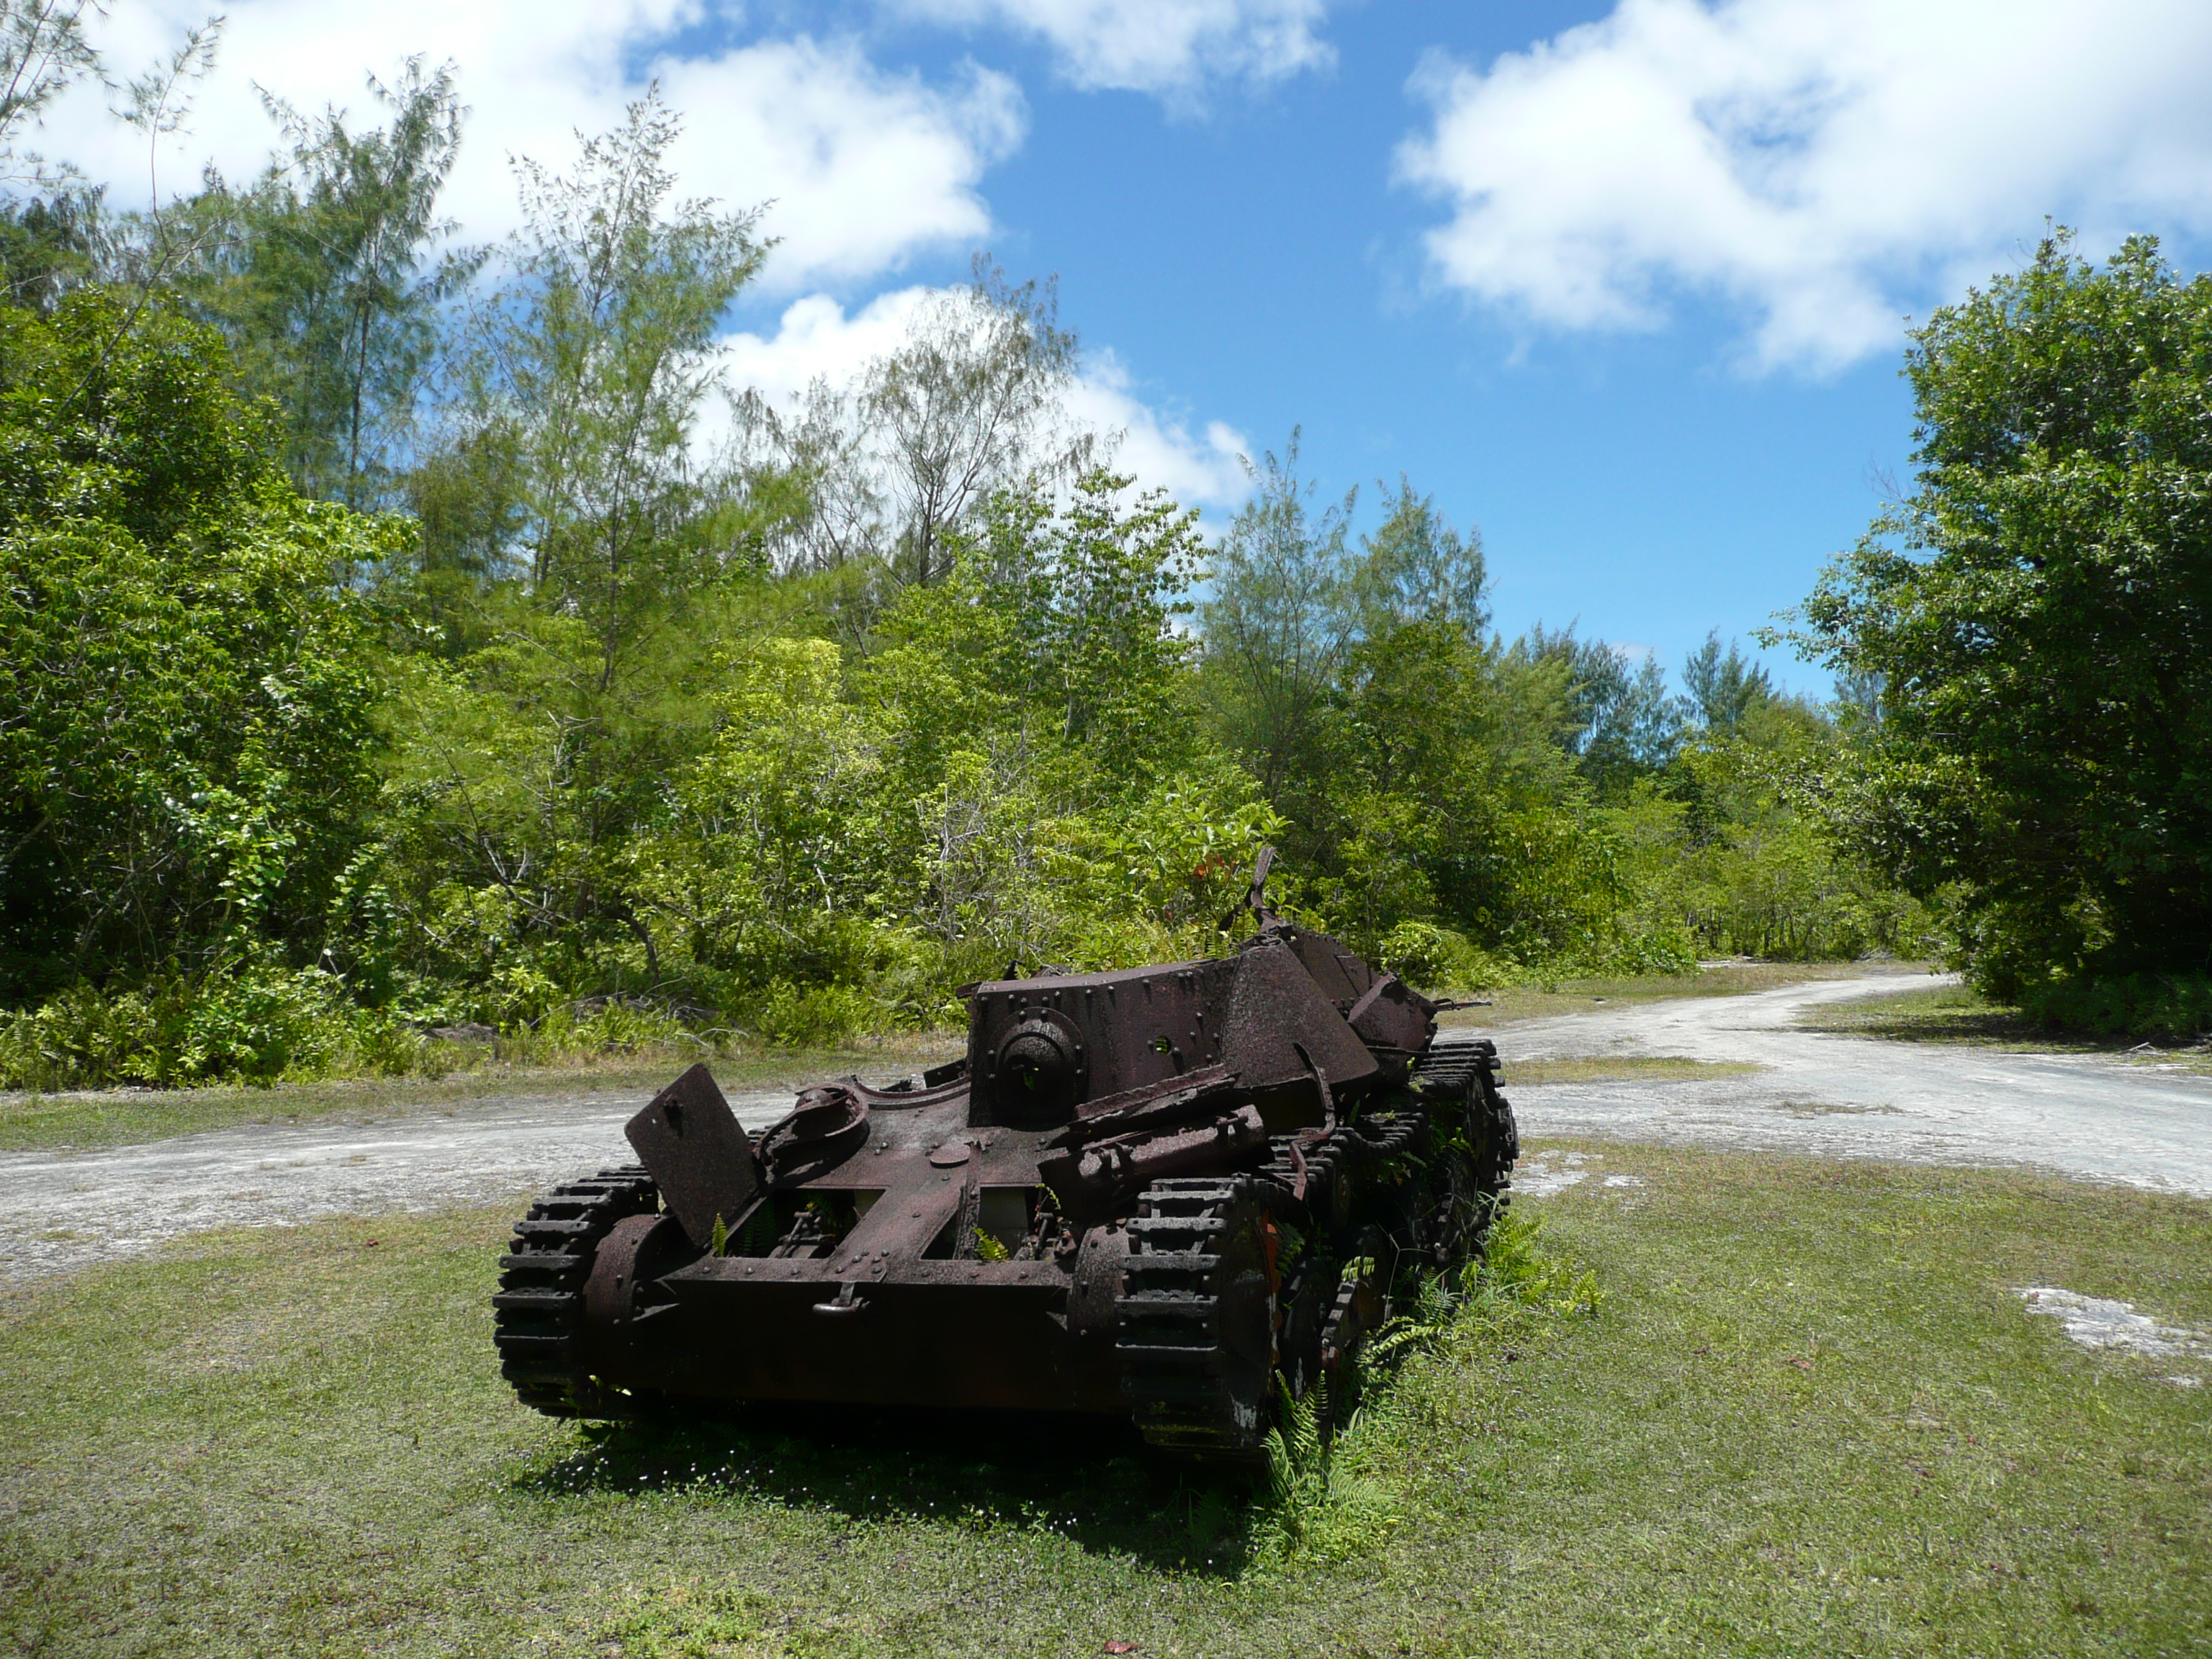
A Type 95 Ha-Go tank ruin at Tarawa, March 2010.
See also
- USS Tarawa, for U.S. Navy ships named for the Battle of Tarawa
- With the Marines at Tarawa, a 1944 short documentary directed by Louis Hayward, which won the 1945 Academy Award for Best Documentary Short Subject.
References
- Notes
- ^ Wright Tarawa 1943 p. 93
- ^ Wright Tarawa 1943 p. 93
- ^ Wright Tarawa 1943 p. 93
- ^ a b c d e f g Alexander, Joseph, Col. USMC (Ret) (1993). "Across the Reef: The Marine Assault of Tarawa". http://www.ibiblio.org/hyperwar/USMC/USMC-C-Tarawa/index.html.
- ^ Wright Tarawa 1943: The Turning of the Tide p. 10
- ^ Rice Strategic Battles of the Pacific p. 53
- ^ Russ Line of Departure: Tarawa p. 102
- ^ Masanori Ito; Sadatoshi Tomiaka; Masazumi Inada (1970). Real Accounts of the Pacific War, vol. III. Chuo Koron Sha.
- ^ "Japanese Armor". Tarawa on the Web. http://www.tarawaontheweb.org/japtank.htm.
- ^ Johnston Follow Me! p.146
- ^ Johnston Follow Me! p.147
- ^ Johnston Follow Me! p.149
- ^ Johnston Follow Me! p.150
- ^ "Japanese Casualties from The Battle for Tarawa, USMC Historical Monograph". ibiblio at University of North Carolina - Chapel Hill. http://www.ibiblio.org/hyperwar/USMC/USMC-M-Tarawa/USMC-M-Tarawa-C.html. Retrieved 2010-03-23.
- ^ Johnston Follow Me! p. 164, 305
- ^ Johnston Follow Me! p.111
- ^ "Marine Casualties from The Battle for Tarawa, USMC Historical Monograph". ibiblio at University of North Carolina - Chapel Hill. http://www.ibiblio.org/hyperwar/USMC/USMC-M-Tarawa/USMC-M-Tarawa-B.html. Retrieved 2010-03-23.
- ^ Smith Coral and Brass pp. 111–112
- ^ "Chronology of Events at Tarawa from The Battle for Tarawa, USMC Historical Monograph". ibiblio at University of North Carolina - Chapel Hill. http://www.ibiblio.org/hyperwar/USMC/USMC-M-Tarawa/USMC-M-Tarawa-D.html. Retrieved 2010-03-23.
- ^ "Return to Tarawa". The Tokyo Reporter. 2009-09-14. http://www.tokyoreporter.com/2009/09/14/return-to-tarawa/. Retrieved 2010-04-22.
- ^ "WWII Combat Cameraman: 'The Public Had To Know'". NPR.org. 2010-03-22. http://www.npr.org/templates/story/story.php?storyId=124631492. Retrieved 2010-04-22.
- ^ Time Magazine. 6 December, 1943.
- Bibliography
- Johnston, Richard (1948) Follow Me!: The Story of The Second Marine Division in World War II Random House of Canada Ltd, Canada.
- Potter, E.B. and Nimitz, Chester (1960) Sea Power: A Naval History Prentice Hall ISBN 9780870216077
- Rice, Earle (2000) Strategic Battles of the Pacific Lucent Books ISBN 1560065370
- Russ, Martin (1975) Line of Departure: Tarawa Doubleday ISBN 9780385096690
- Smith, General Holland M., USMC (Ret.) (1949) Coral and Brass New York, New York: Scribners ISBN 9780553265378
- Wright, Derrick (2001) Tarawa 1943: The Turning of the Tide Oxford: Osprey History ISBN 1841762725
Further reading
- Alexander, Joseph H. (1995). Utmost Savagery: The Three Days of Tarawa. Naval Institute Press.
- Graham, Michael B (1998). Mantle of Heroism: Tarawa and the Struggle for the Gilberts, November 1943. Presidio Press. ISBN 0891416528.
- Gregg, Howard F. (1984). Tarawa. Sein and Day. ISBN 0-8128-2906-9.
- Hammel, Eric; John E. Lane (1998). Bloody Tarawa. Zenith Press. ISBN 0-76032-402-6. http://books.google.com/?id=LZC0eX8CEZMC&pg=PP1&dq=inauthor:%22Eric+M.+Hammel%22&cd=6#v=onepage&q=.
- Russ, Martin (1975). Line of Departure: Tarawa. Doubleday. ASIN B0015T5R3U.
- Wukovitz, John (2007). One Square Mile of Hell: The Battle for Tarawa. NAL Trade. ISBN 0451221389.
External links
- Tarawa on The Web
- Animated History of The Battle of Tarawa
- "Operation Galvanic (1): The Battle for Tarawa November 1943". History of War. http://www.historyofwar.org/articles/battles_tarawa.html.
- Defense of Betio Island, Intelligence Bulletin, U.S. War Department, March 1944.
- The Assault of the Second Marine Division on Betio Island, Tarawa Atoll, 20-23 November, 1943
- Timeline of the Battle
- Eyewitnesstohistory.com - The Bloody Battle of Tarawa
- Marines in World War II Historical Monograph: The Battle for Tarawa
- U. S. Army at Tarawa
- Slugging It Out In Tarawa Lagoon
- Heinl, Robert D., and John A. Crown (1954). "The Marshalls: Increasing the Tempo". USMC Historical Monograph. Historical Division, Division of Public Information, Headquarters U.S. Marine Corps. http://www.ibiblio.org/hyperwar/USMC/USMC-M-Marshalls/index.html. Retrieved 2006-12-04.
- United States Strategic Bombing Survey (Pacific), Naval Analysis Division (1946). "Chapter IX: Central Pacific Operations From 1 June 1943 to 1 March 1944, Including the Gilbert-Marshall Islands Campaign". The Campaigns of the Pacific War. United States Government Printing Office. http://www.ibiblio.org/hyperwar/AAF/USSBS/PTO-Campaigns/USSBS-PTO-9.html. Retrieved 2007-06-11.
- George C., Dyer, Vice Admiral, USN(RET) (1956). "The Amphibians Came to Conquer". The Story of Admiral Richmond Kelly Turner, Chapter 18, That Real Toughie--Tawara. Director of Naval History, U.S. Government Printing Office, Washington, D.C. 20402, Library of Congress Catalog Card No. 71-603853. http://www.ibiblio.org/hyperwar/USN/ACTC/actc-18.html. Retrieved 2011-05-05.
- "Tarawa" cat survivor adopted by US Coast Guard
- Oral history interview with John E. Pease, a U.S. Marine Veteran who took part in the Battle of Tarawa from the Veterans History Project at Central Connecticut State University
- National Archives historical footage of the battle for Tarawa
Categories:- Pacific Ocean theater of World War II
- 1943 in Kiribati
- Wars involving Kiribati
- World War II operations and battles of the Pacific Theatre
-


Wikimedia Foundation. 2010.